Motorhome Leak Prevention, Identification and Repair Steps Featured
Written by Matt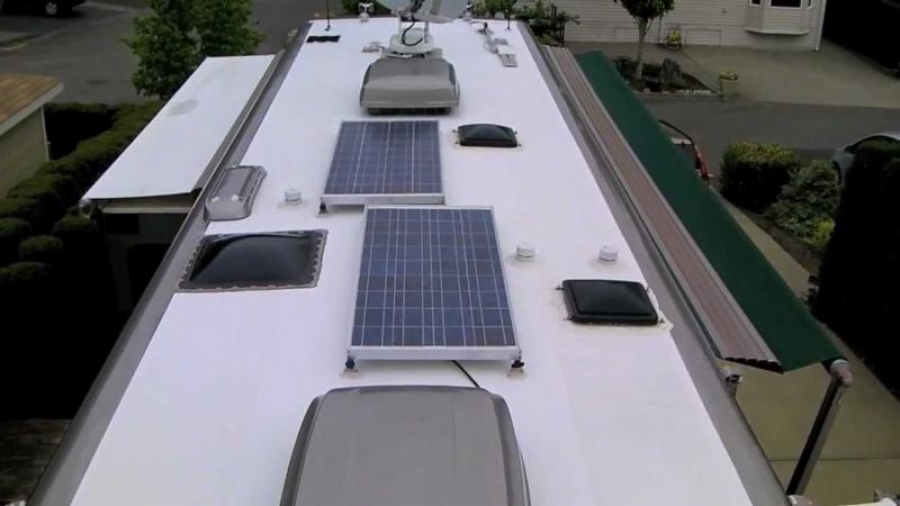
When water gets inside an RV, the problems it causes are a lot bigger than each of those tiny drops.
Some water damage is easy to see because it marks interior surfaces.
Other water damage is harder to see because it’s inside walls, ceilings and floors. Framing can rot. Sidewalls can delaminate. The hidden damage may be the most sinister because it may include dangerous mold.
Water can enter an RV anyplace the outer shell is breached—and an RV has many openings, some intentional, others not.
Here are the places leaks are likely to occur:
- Roof and roof coating
- Skylights and vents
- Mounts for accessories, such as solar panels, antennas, ladders and horns
- Windows
- Doors, both entry and storage
- Utility hookups
- Corner seams
Leak Prevention
Every four to six months, check any Dicor coatings over seams and around equipment mounts. Look for cracks, both large and small.
Also make it a habit every four to six months, during prolonged good weather, to pull a few screws. Many screws are under decorative covers, which you’ll have to pry off gingerly to avoid breaking. (The older non-metal covers are, the more likely the sun has baked them into a brittle state. If you break a cover, replace it.)
On campers with corrugated siding, be sure to check some screws on corner moldings.
Look over the backed out screws. If the threads are rusty, water is entering.
You also should check your EDPM (ethylene propylene diene monomer) roofing. You don’t need to re-seal the roof surface, but you should clean it with a medium brush and mild detergent that does not contain petroleum distillates every six months. Keeping it clean will allow you to better identify any breaks or weak spots.
Leak Detection
The most obvious sign of a leak is a water stain on an interior wall or ceiling, or delamination of cabinetry where water soaked it. Mildew or mold also may appear. Unfortunately many leaks simply don’t show on a surface.
Water migrates inside walls and ceilings, so the leak may be in front of, behind or beside the damage. For that reason, try to detect leaks on the exterior. One method is a pressure test. You can pay to have this done by a dealer or shop, usually for $200-$250, plus a labor charge if the shop does the repairs.
During a pressure test, compressed air is pumped into the RV. Soapy water is sprayed onto seams—around windows, doors, roof-mounted equipment, essentially all the areas listed above. If air is escaping, the soapy water will bubble. The same gaps, though quite small, that let air out probably let water in.
You can perform an air test yourself, even without specialty equipment. Make a hard cover for a small exterior opening, such as to a storage area, and cut a hole to accept the end of a shop vacuum hose or leaf blower outlet. Insert the hose and duct tape the connection, log with the edges of the patch, turn on the pressure and spray the soapy water, then look for leak-indicating bubbles.
Another method is to spray canned smoke inside where you suspect a leak, and have another person outside to look for escaping smoke.
Leak Correction
Frequently, all that needs to be done where Dicor is cracked is to plug the cracks with more Dicor, applied with a caulking gun. Clean the surface first with a rag dampened—not soaked—with mineral spirits so the new Dicor will adhere. Dicor, which is self-leveling, seeps into the cracks after it is applied.
Warning: Mineral spirits can harm EDPM roofing, so apply sparingly. The best thing to do is wipe areas where mineral spirits were applied with a cleaner that does not contain petroleum distillates.
If there’s a crack in the EDPM, Dicor is compatible and can be applied to seal the breach. Use the same procedure as for cracked Dicor.
Also look for loose Dicor. It would probably cause a major leak around mounts or large breaches, such as for vents or skylights. Remove loose Dicor and the item it’s sealing, then reinstall and reseal the accessory. If there’s evidence of water damage in the ceiling or in sidewalls, spray with a disinfectant, then dry everything out with heat and lots of airflow before reassembling and installing a new bead of Dicor and screws. Dicor is compatible not only with EDPM, but also with wood, fiberglass, plastic, steel and aluminum.
Replace rusty screws in the proper size. Coated screws will be less prone to rust.
If you’re sealing corners, consider a tape such as Seal-Tite. Once you’ve removed the insert trim, which hides screws, remove the screws, molding and old sealant, such as tape or putty. Stretch the pressure-sensitive side of the flexible tape over the opening, being sure to close gaps due to the irregular surface of siding. Then replace the cleaned molding coated with underside beads of sealant along the two edges, and new screws. You may want to add new insert trim in the molding for better looks.