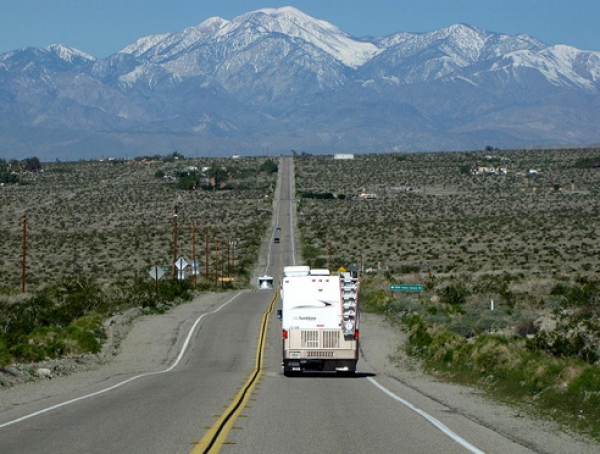
Welcome to Crossing Creeks RV Resort & Spa in the heart of iconic Blairsville
Each year there are thousands of new motorhomes and campers of all types that hit the road. While this traveling preference never seems to grow old, it does go through cycles related to the economy and our travel preferences.
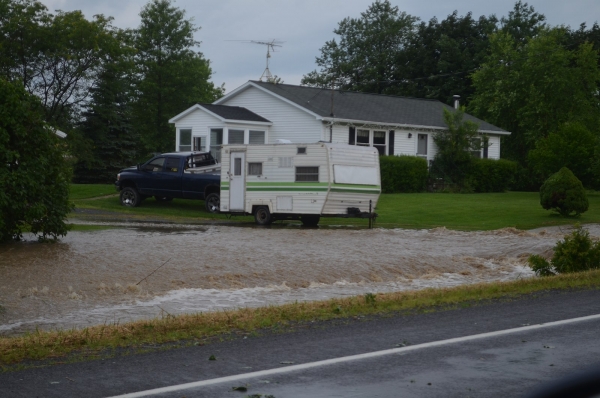
Flash floods are a very real threat to RVers. You just need to know where to turn for warnings and understand them so you can safely continue your journey to Crossing Creeks RV Resort and Spa!
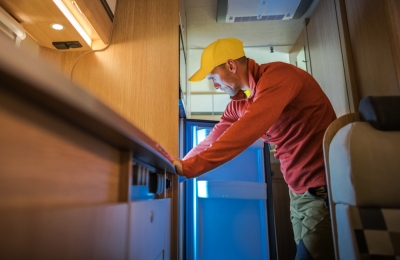
Sometimes you can’t get around the need for a bigger refrigerator in your motorhome or towable. The permanent fix is upgrading to a bigger built-in fridge, but that’s also the most expensive solution.
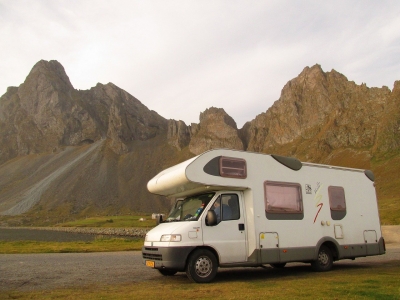
Your tow vehicle and motorhome have a mechanical maintenance list aside from the items to make sure your camping needs are met.
Where to Hunt for Gold, Rubies, Other Gemstones in North Georgia
Written by Matt
The days of striking it rich by prospecting for gold and gems in Georgia are long past, but you just might unearth a mother lode of fun. You’ll also come up with some raw, uncut gemstones and maybe even some gold!
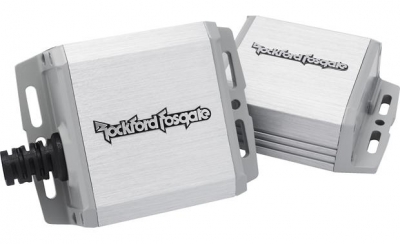
Even if your RV is relatively high end, chances are that the speakers in its standard sound system leave something to be desired.
There are hundreds of options out there for improving sound inside or outside your rig. If you’re not as enthusiastic for big wiring jobs as you are for big sound, plenty of aftermarket speakers are wireless, connecting to your sound source by Bluetooth signal instead of cables. Some have built-in microphones so you can wirelessly use your phone to make and receive calls.
Not all radios or music players have Bluetooth, but your smartphone, tablet or laptop should. If your RV’s built-in radio/music player lacks Bluetooth, it’s easy to upgrade the radio—easier than wiring in multiple speakers—since most RV sound systems are really just car radios.
What You Need
You will need a 110-volt line or USB outlet to power the speakers and to recharge a speaker’s internal battery. You could also recharge most from a battery bank with a USB port. With the right speaker choice, you can take your wireless speakers outside.
Most of these compact speakers won’t move enough air to be heard over a great distance, but they’ll fill the inside of your RV with quality sound and satisfy a typical outdoor gathering.
Portable Wireless Indoor Speakers
Bose Soundlink Color II
Features: Bluetooth connectivity; 110v/USB rechargeable; pairable for stereo; built-in microphone; water resistant.
Size: 5.6 x 5 x 2.2 in.
Weight: 1.2 lb.
Price: About $130.
The rechargeable Bose Soundlink Color II has good mid- and high range-sound according to reviews. It connects wirelessly by Bluetooth, or by 3.5mm cable. Its built-in microphone allows it to be used as a speakerphone with a smartphone. Soundlink Color II can be paired for true stereo sound. It’s available in black, white, blue, red or yellow. Not all sellers have all colors.
The Bluetooth range is 30 feet, so you should be able to take it outside. The speaker is padded for some shock resistance, and with its iPX7-rated water resistance, it can resist splashes, mist or even accidental immersion in up to 30 inches of water. The “X” in the rating means it is not tested for dust resistance.
Its biggest drawback: Soundlink Color II has weak bass compared to some rivals. If you don’t like being overwhelmed with bass, however, that may be a plus.
Klipsch Groove
Features: Bluetooth connectivity; 110v/USB rechargeable; top-mounted controls or wireless control through connected device; splashproof.
Size: 4.56 x 5.51 x 2.65 in.
Weight: 1.7 lb.
Price: $99
The compact Klipsch Groove produces excellent sound for its size. This black speaker has a 3-inch driver for clear music in all ranges, although some reviews say it distorts a bit on the high end at full volume. Bass is better than from many of its competitors, thanks to twin passive bass radiators.
The range of the Groove’s Bluetooth wireless connection is 33 feet, so it’s easy to carry it outside. It’s splashproof but not immersible, with a rating if iPX4. The Groove recharges via a USB port or with the included 110-volt power brick.
The main negatives: It cannot be paired with a like speaker for true stereo, and it lacks a microphone, so it cannot be used as a speakerphone.
Ultimate Ears Hyperboom
Features: Bluetooth connectivity to two devices at once, or connect by 3.5mm cable; memory for 8 devices; big sound in all ranges from twin tweeters, twin woofers and twin bass radiators; adaptive EQ; fine tuning from app or speaker-top buttons; splashproof; recharges by 110v power brick; superior 24-hour battery life.
Size: 14.3 x 7.5 x 7.5 in.
Weight: 13 lb.
Price: $399
If your fifth wheel, travel trailer or motor home is big, so is the sound from the Ultimate Ears Hyperboom: It encases two 1-inch tweeters, two 4.5-inch woofers and two 3.5- x 7.5-inch passive bass radiators. The music quality is stellar. At about $400, so is the price.
The Hyperboom easily fills an RV’s main living area, regardless of size, with quality sound. It has an automatic EQ feature, so no matter where it’s used, the sound adjusts to the surroundings.
Move the party outside, because this might be the ultimate portable Bluetooth party speaker. The Hyperboom is rated iPX4, so it’s splashproof. The battery can last all day and all night—literally. This speaker will give you more sound than you need for an outdoor gathering, even over chatter, laughter and the crackle of the fire pit. Fortunately, you can control the volume as well as the level of bass and treble, so even when the Hyperboom is whispering, clarity is first rate.
The biggest negatives: Big is the operative word here. With its size and all those speakers, the Hyperboom weighs 13 pounds—not everybody’s idea of portable. You must supply the 3.5mm cable if you choose to use one. It doesn’t function as a speakerphone. And although you can fast-forward through tracks, you can’t backtrack.
Outdoor Speakers
If your rig has outdoor speakers that fail to meet party standards, audio dealer Crutchfield recommends adding amplifiers. The amps are wired in before the speakers on existing circuits. You can add improved outdoor speakers, too. Make sure all are marine- or RV exterior-rated. Amps run about $150-250 per channel. Each flush-mount round outdoor speaker generally costs $30-$50.
If your tiny trailer lacks outdoor speakers and you want to add them easily, the King RVM1000 houses two speakers and a light for abut $50. The twist is that although it’s wired for power off an existing light circuit, the RVM1000 connects to your sound system by Bluetooth. There’s no need to run speaker wire.
Remove the standard light and connect the RVM1000 in its place. You’ll have LED exterior lighting but also have sound from a Bluetooth-connected computer, tablet or smartphone.
Image Credits: crutchfield.com
How To Clean Your RV Living Area of Coronavirus Pathogens
Written by Matt
With coronavirus pathogens still present across America, keeping the living area of your RV disinfected becomes more important than ever.
Many of the cleaning agents you’ve been using in your RV living area are effective against coronavirus pathogens, but others may not be. If you decide to use cleaning products aimed at coronavirus pathogens but unfamiliar to you, it’s important to use products properly so they don’t harm fixtures, furniture and electronics.
The federal Centers for Disease Control lists cleaning agents that will kill coronavirus. You’ll have to look for numbers on each cleaning product label to see which qualify as CDC-approved disinfectants. You’ll also have to read the labels of individual products carefully to make sure they are compatible with the varying materials in your RV.
RV living spaces contain materials that are different from those in a motorhome cockpit or tow vehicle interior. For products to safely disinfect vehicle interiors, see our companion piece.
Match Materials, Cleaners
The living area of your RV contains pretty much the same materials as in a sticks-and-bricks home, so you can usually use the same cleaning agents that you would use at home. You just have to make sure they don’t just clean but also kill coronavirus pathogens. Cleaning can remove some virus pathogens but doesn’t kill them.
Some agents are hard on certain surfaces, so read the labels carefully. Certain foaming bathroom cleaners, for example, can destroy acrylic surfaces. Call your RV manufacturer’s customer service line for advice on what makes up the surfaces in your camper and what can clean them safely. The number is in your owner’s manual, or you can search for it online. Have your RV serial and model numbers available, since manufacturers do change some materials from year to year.
What To Use
In the living area, disinfect surfaces that you routinely touch: countertops, handles, knobs, cooking surfaces, switches, bathroom and toilet surfaces, plumbing fixtures and dinettes. You’ll also want to clean electronics, including computers, keypads, your cell phone and remote controls, all of which require special care.
In general, to disinfect living-area surfaces, it’s best wear disposable gloves. Even if youi do, wash your hands for 20 seconds with soap and water after cleaning.
Do Use
- Bleach. Use only on colorfast, non-porous surfaces, such as countertops, sinks and ceramic tile floors. In a bottle, mix 4 teaspoons of bleach with a quart of water. Wipe it on and let it work for four to five minutes, then rinse with clear water and wipe dry to avoid damage. Add a cup of bleach to a gallon of hot water for nonporous floors. WARNING: Mix bleach with water only. Combining it with other chemicals or cleaners could generate poisonous fumes or even explosions.
- Hydrogen peroxide. Use the standard household 3 percent solution—that’s the way you buy it— on nonporous surfaces. It’s especially good on metal, such as handles and drawer pulls. Let it stand for about 10 minutes. It actually does not have to be wiped off because it evaporates, according to Consumer Reports. Do not get it on fabrics, which it will stain permanently. Never mix it with other cleaners or chemicals.
- Isopropyl alcohol. It is safe for most surfaces and must contain at least 70 percent alcohol to be effective. Many disinfectant wipes contain alcohol. It must remain on the surface at least 30 seconds before being wiped off.
- Disinfectant cleaners and sprays. Use on hard surfaces only, wiping on and allowing to stand 30 seconds before rinsing off and wiping dry. See special instructions from Good Housekeeping on how to use disinfectant spray on a paper towel to clean phones. Clean remote controls, computers and keyboards the same way.
- Soap and water. This would include detergent, which is even more effective. Soap will clean off grease and surface dirt, making it tougher for pathogens to take hold. Scrub vigorously for soap to be effective, using a cloth or paper towel, plastic abrasive scrubber, or a sponge you’re willing to throw away. The soap breaks down the fatty outer surface of the coronavirus pathogen, rendering it harmless. Let stand for four minutes, then rinse with clean water and wipe dry. Use mild soap and water on leather or cloth upholstery.
- Disinfectant mop pads. Use one of these on hardwood floors, which would discolor with bleach.
Do Not Use
- White vinegar. It will not destroy coronavirus pathogens. It can, however, clean the surface of dirt where pathogens can lodge, including on hardwood floors. Let it dry and finish with a disinfectant.
- Simple Green All-Purpose Cleaner. Only industrial-targeted Simple Green Disinfectant will kill coronavirus pathogens. Regular Simple Green All-Purpose Cleaner is versatile and will clean surface dirt and grease, so it’s a good way to start on hard surfaces to rid them of the dirty layer where coronavirus pathogens often lodge. But then you must rinse, dry and follow up with a disinfectant.
- Vodka. It’s not sufficiently strong to destroy coronavirus pathogens. Save it for a martini; don’t use it to clean.
Other Hygiene Tips
The CDC has a page of tips for keeping your home, and therefor, an RV, safe. It includes tips for maintaining a safe home when someone living there has Covid-19.
After cleaning and disposing of gloves, always wash your hands with soap and water for 20 seconds. Washing hands frequently and keeping them away from your face is recommended.
The CDC suggests using plastic covers for electronics if they are available.
If you use cloth towels to apply or wipe down disinfectants, wash them with your laundry. Use the hottest water setting appropriate for the load.
Disinfecting Your Motorhome Cockpit and Tow Vehicle Interior
Written by Matt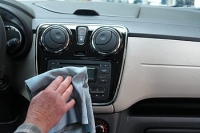
For RVers still on the road, it’s important to keep the cockpit of your motorhome or tow vehicle disinfected during the coronavirus pandemic.
True, many states have stay-at-home orders in effect. But thousands of RVers live full-time in their RVs. Many thousands more who routinely hit the road for much of the year probably headed out before extent of the pandemic was revealed. Even as states reopen, following best practices to fight the spread of pathogens that cause the Covid-19is advisable.
Paramount are properly disinfecting your hands and your vehicle interior.
It’s not necessary to wear a mask when you’re inside your vehicle, but put one on before going into a store or to a gas pump, and wear disposable gloves. A mask protects you a bit more and everyone around you much more.
For tips on keeping your RV living area free of coronavirus pathogens, see our companion piece.
Pumping Fuel
Perhaps nothing you touch as an RVer is more likely than a fuel pump handle to be touched by many other people. That means it could contain coronavirus pathogens.
Consumer Reports suggests that you wear disposable gloves when handling a fuel pump, either gas or diesel. You might be thinking, Well, I always wear gloves when I pump diesel. If you store those gloves away after refueling and wear them again the next time you pump, that’s not a good idea right now.
Gloves that touch a contaminated pump handle or contaminated pump buttons may pick up pathogens and retain them. How long? Reuters reports that the National Institute of Allergies and Infectious Diseases found that coronavirus pathogens could last several hours to several days, depending on the surface. Disposable gloves can help to counteract that threat. During the pandemic, cover your hands with disposable gloves when pumping.
Disposable gloves aren’t easy to come by right now. If you can’t get them, try using two plastic food storage bags over your hands and properly dispose of them the same as you would gloves.
Clean your hands before getting back into your vehicle with a hand disinfectant. That way, you’re more nearly certain not to deposit pathogens on interior surfaces. If you cant find hand disinfectant, keep soap—either bar soap or soft—plus a spray bottle of water and some paper towels handy, and wash for 20 seconds before getting back in your vehicle. Put them in a small caddy so you can place them on or beside your vehicle for easy access before you get back in. Dispose of used paper towels or wipes immediately.
Disinfecting Automotive Interiors
Disinfecting the cockpit of your motorhome or tow vehicle requires the most attention during actual travel. It’s where you’re most likely to deposit pathogens from your hands as you re-enter after stopping for fuel, food or bathroom breaks. Food has not been found to be a transmitter of pathoens.
Wear disposable gloves to disinfect an interior, then wash your hands for 20 seconds with soap and water after you dispose of the gloves.
Do use:
- Disinfectant wipes that do not contain bleach. Use on hard surfaces, especially the steering wheel. Also use them to clean door handles, armrests, control switches and buttons, displays screens, shift levers and paddles, seat belt buckles and the instrument panel cover.
- Disinfectant, such as Lysol, sprayed onto a paper towel. Apply it to the items above.
- Alcohol solutions containing at least 70 percent isopropyl alcohol. They can be used on just about any interior surface, but be warned that keeping alcohol in the vehicle interior is not recommended, since high temperatures may cause alcohol to boil.
- Soap and water, including dishwasher liquid diluted by water. As noted above for hand washing, soap breaks down the protective covering on coronavirus pathogens. It can do the same on interior surfaces, but it will require some scrubbing—not too much— with a towel or sponge. Rinse with a towel soaked in clear water. Along with dedicated leather cleaners, Ivory soap and water is recommended for leather, followed by a leather conditioner.
Do Not Use
- Bleach. It can weaken plastic surfaces, making them soft, and can permanently discolor fabrics and other porous materials.
- Hydrogen peroxide. The reasons are the same as for bleach.
- Ammonia or cleaners that contain it, such as blue window cleaner. Ammonia is OK on windows if you’re careful about applying it. Spray onto a paper towel, not onto the window, to avoid excess spray. Ammonia will break down the surfaces of plastics, and it can damage touch screens.
Wash Hands Frequently
The CDC recommends washing your hands frequently, 20 seconds each time, with soap and water. Keep your hands from your face as much as possible, even if you touched only a disinfected surface. Launder cleaning cloths with other laundry, using the hottest setting appropriate for the load. Dispose of paper towels and sponges, which may trap germs.
Laundry day in the RV can be especially trying: Lug all your clothes and hoarded quarters to a coin-op laundry. Wait for an available washer. Load the machine. Wait. Hope another customer doesn’t scoop up the lone unclaimed dryer before your rinse and spin cycles end. Transfer clothes to the dryer. Wait. Fold. Carry everything to your car or tow vehicle. Drive back to your RV.
Wouldn’t it be nice to wash and dry right in your RV, without using the sink?
You can install a washer and dryer in your RV if you have the room, and with a portable you can at least wash an emergency load or two inside or outside your rig even if you don’t have the space for a laundry.
Finding Space
If your trailer or motorhome offered a washer/dryer option, then your RV—even if it lacks the appliances—has a place to build them in. Some cabinet modifications are probably needed. Look online for detailed plans for your RV or call the manufacturer’s customer service line to find out if your RV model can easily accommodate a washer and dryer.
If your RV was not designed for a washer and dryer, you still might be able to install the appliances in a closet or pantry. Some units, including washer-dryer combos, may fit under countertops if you remove a base cabinet.
Hookups
You’ll have to make sure hookups can be accomplished. The location of your washer and dryer should be:
- Near electrical power.
You’ll need two 110-volt outlets for two separate appliances, or one for a washer/dryer combination, 240 volts for some models. You may have to relocate electrical outlets to make sure the plug will fit between the appliances and outlet.
- Convenient to the grey tank.
You’ll have to tap into the grey tank with the washing machine’s outlet hose.
- Tall, wide and deep enough.
The space must accommodate the height of the appliances, the recommended minimum side clearance and the recommended front and back clearance. Some units require zero side clearance.
- Big enough for a vent.
Dryers come vented and unvented, but unvented dryers dump excess moisture into your RV interior. Venting through an exterior wall is preferable.
Appliance Styles
Options abound, making it possible to add a washer/dryer to just about any RV bigger than a teardrop or popup. And thanks to small portables, you can even do laundry in or outside one of those smaller campers.
Here’s what’s available to build in:
Washer/dryer combo. About the size of a washer alone, these front-loading units turn into a dryer after the wash, rinse and spin cycles. That saves space. Some, such as the Splendide 2100XC, automatically start drying when the washing is done. The capacity of the washer is 15 pounds, and the dryer, 11 pounds. Cost: $1,100 to $1,350.
Stackable. An RV-size front-load washer and dryer stacked, such as the Equator EW 824 and ED 850, require only the footprint of the washer, about 23 inches wide and 22 inches deep, but need about 5 feet in height. The washer is on the bottom and the dryer on top. The washer and dryer each hold 13 pounds. Cost: $1,250-$1,500.
Stacked integrated unit. Often found in apartments, these compact units have a washer on the bottom and a dryer on top. They are made as one tall unit, each about 28 inches wide. The GE Spacemaker Laundry Center needs about 6½ feet of height. It can handle 3.8 cubic feet for washing and 5.9 for drying. Some models may require a 240-volt line and breaker. Cost: $1,250-$1,500.
Portables for Tight Spaces
Tiny alternatives—portable units that wash a small load and spin the items quite dry in a separate drum—help out in small campers. An example is the Best Choice Model SKY5406 twin-tub washer. It can wash a small load, about 8 pounds, with a separate spinning drum that can dry up to 5 pounds. With a power demand of 140 watts or less, it’s possible to run on solar power. Cost: $95-150.
Portables have hoses or hookups for hoses, or you can just fill from a bucket or large bottle. These units aren’t always automatic. You may have to add water for the rinse, and the dryer drum uses the low-tech method of sensing if clothes are dry: Stop and feel them. Drain into your shower or use natural, biodegradable soap and drain outside where permitted.
Clothes Lines
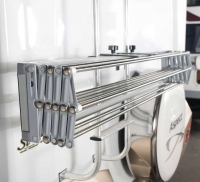
If you go without a dryer, or if you use a portable, you’ll need to hang your laundry to dry.
Look for something that has convenient setup and teardown. The Smart Drier clamps onto the ladder of your camper and opens to reveal several lines for hanging clothes and linens. With the sun reflecting off your RV, clothes dry quickly, especially if hung after being spun thoroughly. Cost: $100 or less.
The Australian-made Versaline Traveller Compact RV Clothesline hangs on two wall brackets that you screwed into a side or back exterior wall of an RV or to vehicle. It removes easily and folds into a carrying case when you’re done. Cost: $150 or less.
Image Credits: campingworld.com
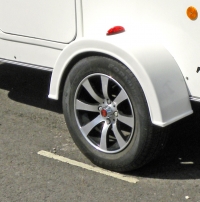
Don’t undersell the importance of the trailer tires you choose. It all rides on those tires—quite literally.
A blowout not only causes a handling hazard, it can damage a trailer as the shredded tire carcass whips against bodywork.
Never use passenger tires on a trailer. They are usually rated Load Range B, a 4-ply equivalent, because their sidewalls are flexible for a smooth ride—far too flexible for trailer duty. They are not engineered to stabilize heavy loads or to handle the temperatures that build with them.
ST, or Special Trailer, tires are intended only for trailers. ST tires must never go on drive or steer wheels. Their stiffer sidewalls are engineered to handle the tall loads of a travel trailer or fifth wheel on straights and in turns but not the stresses generated by steering and acceleration. They are at least Load Range C, which means the sidewall is rated 6 plies.
Lately some trailer owners—and even manufacturers—are equipping trailers with LT, or Light Truck, tires.
How Good Are Standard Tires?
American RV manufacturers, except some making compacts and popups with wheels smaller than 13 inches, equip each new trailer with radials. You can run bias ply tires on your camper and radials on your tow vehicle, but you cannot mix bias and radial tires on the trailer itself. Bias plies are cheaper but have a shorter life and get lower fuel mileage.
Don’t expect top-of-the-line tires on any but upscale models of travel trailers and fifth wheels. Some builders offer better tires as an option. Economy trailers and the increasingly popular light travel trailers usually have basic ST tires. They will have load capacities suitable for the loaded trailer, but they probably are rated 65 mph. Better ST tires are speed rated M, to 81 mph.
You can replace the standard tires with STs that have a greater load range, such as D or E. That would at least improve your trailer tires’ resistance to heat, a major cause of tire failure from the inside out.
Most trailer tires, especially the more affordable, are made in China. Shop carefully. If you’ve heard the expression “China bombs,” it’s a reference to cheap Chinese trailer tires that tend to blow out. For a while, Chinese-made LT tires and high-performance passenger tires had the same problem. Although some Chinese tires are poorly constructed, others are better built—and cost more. Many U.S. brands also are made in China.
Read the tire reviews, not just the publicity write-ups. Owners who’ve experienced product failure typically don’t shy from writing about it.
Are LT Tires Safe for Trailer Use?
LT tires are intended for vehicles that generate stress with heavy loads—pickups, commercial vans, and heavier SUVs. Their stability makes them ideal for mounting on a tow vehicle. Over the last couple of years, some camper trailer makers, including high-end manufacturer Airstream, have offered LT tires as an option. Some trailer builders have even made LTs standard.
ST tires and LTs differ. The truck tires have a higher top speed, typically to 100 (speed rating Q) or 106 (R). You may or may not want to haul a trailer at 75 mph, but the higher top-speed rating usually means a tire better resists heat buildup. Remember, heat is a tire’s enemy.
Another difference is maximum inflation pressure. An LT tire likely has a lower maximum pressure than a similarly sized ST. Any tire pressure sticker on your trailer wouldn’t apply to LTs. If you go with LTs, inflate to the maximum pressure embossed on the sidewall. Avoid over or under inflating, and don’t overload your trailer.
Buying a higher load range stiffens a sidewall, so an LT tire with Load Range D, E or F is advisable on heavier trailers.
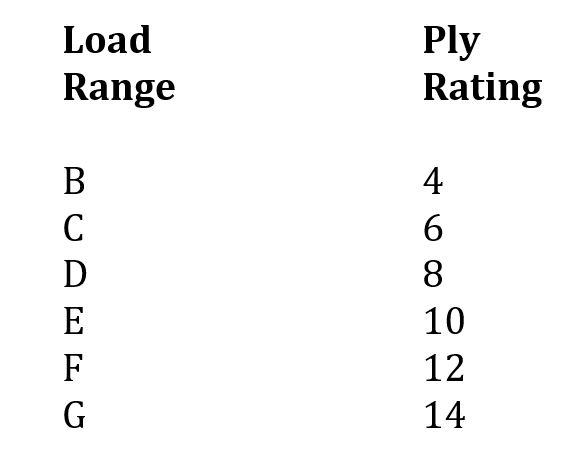
The farther into the alphabet the letter designation goes, the stronger the sidewall. Most passenger tires are Load Range B, but trailer and truck tires go higher.
Most tires have two-ply polyester cord sidewalls, and some are three-ply. Not all plies are the same. Plies are sheets of rubber encasing fabric threads that are twisted into strong strands, or cords. Depending on weight and thickness, those plies may be intended for lighter duty, as on a car, or for handling heavier loads, as on a truck.
Decades ago, the number of plies would increase on truck tires, sometimes to 10 or even 12. The letters used for load range today are intended to represent stiffness equal to multiple plies, not the actual number of plies:
If You Switch to LT
Make sure an LT’s load capacity—for example, the number 125 in the tire size 275/70R18, 125R, E—is equal to or greater than what the trailer manufacturer specifies. LT tires typically have a significantly higher load capacity than passenger tires but a lower load capacity than ST tires. The 125 indicates a load capacity of 3,640 pounds per tire. Consult a load capacity chart. Also check to see that the trailer wheels can handle the maximum pressure.
Don’t forget to add an LT spare. You shouldn’t mix LTs and STs on the same trailer. Also check your warranty and insurance policies to make sure the change would not negate coverage. As always, check tires before every trip and keep them properly inflated.
More...
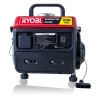
If you live largely on solar when you’re off grid, and even if you rely on generators, portable lithium “generators” are a great addition to your RV energy arsenal.
But let’s get something straight: No matter what they’re called, these lithium-ion units are not generators. They are high-capacity portable storage batteries with built-in inverters and convenient ports for tapping the energy they store. To charge this battery, you still need a gasoline- or propane-powered generator, a campground power supply, a solar array, or in some cases, your car’s alternator and a 12v DC port, possibly with a separate inverter.
Still, once charged, they can store and deliver hours of power for electronic devices, lighting, fans and mall appliances.
Similar to, Different from House Batteries
Similar to lithium house batteries, the portable power supplies:
- Store energy sent by generating devices.
- Can power devices for hours, depending on the draw and the power station’s storage capacity.
- Allow repeated deep discharges without degrading battery health.
- Do not off-gas, making them safe for interior use.
- Are quiet.
There are big differences, too. The lithium portable power stations:
- Don’t get hard-wired to an RV electrical or charging system.
- Have handles for carrying.
- Have built-in inverters for safe, pure sine wave power.
- Include AC and DC connectivity so devices that draw from them do not have to be plugged into an RV’s hard-wired outlets.
Connectivity
Power ports in each unit typically include:
- 110v grounded AC power outlets for such items as fans, lamps, computers, printers, coffee pots, hairdryers, C-PAP machines and televisions.
- USB ports for charging phones and tablets.
- A cigarette lighter-type power outlet for 12v DC devices, such as rechargeable flashlights and tire inflators.
So you can keep tabs on how much power you’re using and have in reserve, some power stations have digital readouts and/or meters. If not, you can attach a meter such as a Kill A Watt, $20-25.
Inputs typically include a grounded (three-prong) AC receptacle, which you can plug into an RV outlet for recharging from your generator, and a solar input from your panels, whether mounted on your RV or portable.
Advantages over Generators
Sometimes you just can’t run even a quiet generator—at night, for instance, when neighbors are close, or park if rules forbid it. And you can’t run a generator if you’re out of fuel for it.
A lithium portable battery is likely to have a cooling fan, but it is about as quiet as a laptop’s. Outdoors, it won’t disturb wildlife.
Limitations
On cheaper lithium power stations, a hairdryer or blender may work on a low or medium setting, but not on high. A microwave or air conditioner is almost surely too much to handle except on high-end batteries with a 1,000w AC output. And although a smaller portable battery can power, say, a computer or a blender, it may not handle both at once.
Breakers shut the units off if they’re overtaxed, keeping them from overheating.
Price of Power
The more capabilities and capacity you want, the higher the price, but the price range is wide.
Here are examples:
Rockpals 240Wh Portable Generator Rechargeable Lithium Battery Pack Solar Generator, $185-200. This Rockpals portable lithium battery can power computers, tablets, cell phones, CPAP machines, small fans, drones and lamps but is not suitable for small appliances, such as hairdryers, coffee machines or toasters. At 5.5 pounds, it’s light enough to take on the trail. Outputs: USB-A (2), 110v AC (2), 12v DC car-type port. Inputs: Wall outlet, car port or solar panel.
Suaoki G500 Portable Power Station Portable Lithium 500Wh Rechargeable Solar Generator, $500-526. The Suaoki G500 is a versatile all-around unit that can power some small appliances as well as recharge electronic devices. A digital display monitors charging input, draw and reserve. At 22 pounds, it’s not light enough for trail use but it’s quite manageable around the campsite. Outputs: USB–A (2); USB-C (1); 12v car-type port (1); 110v AC 300w (2). Inputs: wall outlet, car port or solar panel.
Maxoak Portable Power Station Bluetti EB150 1500Wh, about $1,400. The Bluetti EB150 is powerful and versatile. With 1,000w maximum sine-wave 110v output through its inverter, the Bluetti can power even wattage-hungry hairdryers and blenders, and tools, such as drill-drivers. With 1,500wh on tap, it can power a laptop for a full day, a fan overnight, and probably even a small air conditioner (not a rooftop unit) for six or more hours. At 38 pounds, it’s portable around the campsite or inside your RV. Digital readouts monitor input, output and reserve. Outputs: USB-A (4); USB-C (1); car-type 12v DC (1); 110v AC (2). Input: Solar panels; wall outlet; car 12v port, but only with an inverter.
- 2*AC Outlets(Standard AC110V US Plug) for Most Household Appliance under 1000W Such as TV, mini Refrigerator, Household Dryer, CPAP,Drone.1*DC12V for Car Powered Devices like Car Fridge, Car Vacuum Cleaner,1*PD Type-C (Max 45W) for USB-C Devices Such as Laptop MacBook/MacBook Pro & PD USB-C Phones,4*5V3A(Max) USB for phones, Tablets, Camera, Fans, light, etc, Keep Multi Devices Powered in Case Power Failure or Away from a Wall Outlet, Widely Used for Indoor or Outdoor.
- Solar/AC Recharge: 1)This Power Generator Can be Recharged from the Sun with Solar Panel (Open Circuit Voltage must be 16V~60V(Max),Max 500W,Solar Panel not Included). 2) This Power Station Can be Fully Charged in 10 Hrs by being Plugged into the Wall Outlet.Charge Time varies on the Solar Panel(Higher Power of the Panel, Shorter Charge Time you will Get), eg. 300W Solar Panel: About 5-5.5Hrs. 3*150W Panel in Series: About 3.5-4Hrs. Tips:Car Charge: you need buy a Power Inverter(≥300W) yourself.
- Other Highlights: 1) MPPT High Efficient Solar Charing; 2) MC4 Solar Charging Cable is Included, No need other Charge Controller; 3) Battery Management System (BMS),Protect from Overvoltage,Overcurrent,Short-circuit, Temperature Control & more Safeguards. 4) LCD Screen to Monitor the Remaining Capacity/Charging/Discharge/Abnormal Status, Error Code will be Showed for any Malfunction; 5)Auto Shut off after Fully Charged; 6) 50/60Hz Frequency Adjustable 7)Size&Net Weight: 14.6*6.5*14.4inch,37.9lb.

Some RVers think of rubber roofs as inferior to aluminum or fiberglass roofs, but the simple fact is that most RVs hve one, and a rubber roof can last for 20 years or longer—if it is properly maintained. Of course, maintenance is up to you, the owner.
Periodic maintenance performed on the rubber roof membrane helps to protect the wood roof panels beneath it and the interior of your RV from leaks. Spring is a good time to check your rubber roof for damage, clean it and seal leaks.
If the roof is beyond repair, spring also is a good time to replace one. That’s a labor-intensive job that you may want to leave to a pro, but be warned: Rubber roof replacement, including the membrane and damaged wood panels underneath, can cost $4,000 to $10,000, depending on where you have the work done and the size of your rig. Get competing, detailed estimates before agreeing to have the work done.
Repairs are affordable, especially if you handle them yourself. Whether you do may depend on how capable you are of working on the roof and a ladder, and how comfortable you are with doing that. You can repair spots that have been torn or gouged, or you can replace sections.
Types of Rubber Roofs
Two types of rubber roofing are used on RVs:
- EDPM, or ethylene propylene diene monomer
- TPO, or thermoplastic polyolefin
Your RV owner’s manual should tell you which kind your RV has, and how to care for it. If the manual is missing, call the customer service number for the RV manufacturer and give the service rep your serial number. The manufacturer should be able to tell you what is covering your roof.
Cleaning a Rubber Roof
Sweep the debris from your roof.
Now inspect. Look for cracks, tears and gouges. Inspect not just the roof membrane, but also the sealant around anything that juts through the roof membrane, including fans, vents, skylights, air-conditioning units and electronics.
Before you wash the roof, use vinyl tape to temporarily seal leaks you uncover.
There’ one other important step before you wash the roof: Wash, or at least rinse with a hose or pressure washer, the vertical areas of the RV first, including the front, back and sides. That prevents hard-to-remove streaks on the vertical areas that runoff from the dirty roof might create.
Use a mild soap, such as Murphy’s Oil Soap, or a dedicated RV rubber roof cleane, mixed with water. Do not use a cleaner containing petroleum distillates, citrus or abrasives, all of which can damage rubber membranes. Scrub using a sponge mop or medium-bristle brush on a long handle. If your roof is not meant to be walked on, walk or stand on pieces of plywood that you lay atop the roof.
Rinse with a garden hose, or better, a pressure washer, set to no more than 1,200 pounds per square inch. Higher pressure could damage the roof membrane.
Patching Rubber Membranes
For gouges, tears and cracks, often caused by tree limbs scraping or striking the surface, cut away any loose rubber from the clean, damaged area of the rubber membrane using a utility knife and a scraper. Be careful not to cause more damage to the plywood beneath the membrane. The membrane is glued to the plywood, so a flat-blade scraper may be needed to carefully remove damaged sections of the rubber.
If the plywood is gouged, fill the damaged area with Dicor self-leveling sealant and allow it to cure. Do not use a silicone sealant because roof coatings and patches will not stick to it.
The wounded area, now enlarged, will need to be covered and sealed. Use Eternabond tapes or patches, or a similar product, and cut to size with scissors, generously but not excessively overlapping sound parts of the membrane around the wound. Eternabond and similar products have a sticky side that goes against the old membrane and plywood. They come in various widths and lengths. Keep leftovers for on-the-road repairs after mishaps with trees. Warning: Patching tapes won’t budge once in place, so align patches carefully and roll them out as flat as possible. If the tape has a protective layer on the outer surface, pull it back and discard it.
Smooth the patch by hand, then roll air pockets and loose areas flat, using a small roller, such as a wallpaper roller. Start in the center of the patch and work your way out.
Apply Dicor self-leveling sealant to the edges of the patch a maximum-strength seal against water. While you have your Dicor in hand, patch any cracked or leaky beads around roof-mounted accessories, such as fan and vent openings.
Sealing the Roof
Finish off your roof repairs and maintenance by coating the entire roof with a rubber roof-compatible sealant, such as Heng’s Rubber Roof Coating or 303 Protectant. Apply according to directions, typically with a paint-type roller and long handle. The sealant will make the roof even more waterproof. Just as importantly, the sealcoat will protect the membrane from the sunlight’s ultraviolet rays, which can dry and crack a membrane over time.
Check your roof periodically and do spot repairs as needed. A roof gets dirty nd dusty, so wash it at least one additional time during the season and before storing your rig.

Enough winter, already.
Let’s start planning for spring and some things you can do in March with an easy drive from Crossing Creeks RV Resort and Spa in Blairsville, Georgia, where you can stay in comfort.
Here’s a look at some nearby fun North Georgia Mountains events early in the season:
Dahlonega Festivals
A series of 2020 festivals in Dahlonega, a picturesque town that’s not even an hour’s drive down U.S. 19 from Crossing Creeks, begins with the Dahlonega Literary Festival on March 6 and 7, and the Dahlonega Science Festival, March 6-8. More festivals are scheduled through the year, including the Bear on the Square Festival, April 17-19, and the Dahlonega Arts and Wine Festival, May 15 and 16.
Dahlonega boomed in the early 1800s as the site of the first U.S. gold rush, two decades before San Francisco opened its Golden Gate. You can still pan for gold. For a while in the 19th century Dahlonega had a U.S. mint that produced gold coins. Today the town of about 5,500 people, surrounded by the North Georgia Mountains ad man of Georgia’s finest vineyards, is better known for its festivals featuring the arts, live music, and wine tastings.
The literary gathering inside the Dahlonega Baptist Church, 234 Hawkins St., features nationally known and regional authors, readings and book signings. The list of this year’s authors is online. Admission to the event is free. Money raised through donations and sponsorships benefits literacy projects in Lumpkin County. An eclectic mix of live music will play throughout the two days.
Event: Dahlonega Literary Festival
Location: Dahlonega Baptist Church, 234 Hawkins St., Dahlonega, GA
Time/date: Saturday, March 16, 2020, 10 a.m.-6 p.m.; Sunday, March 17, 10 a.m.-5 p.m.
Admission: Free, all ages
Directions: an hour’s drive from Crossing Creeks
The third annual Dahlonega Science Festival, “Vision 20/20,” will be held on the Dahlonega campus of North Georgia University and in downtown businesses March 6-8. Events at the festival, a project of the Dahlonega Science Council, will examine all sorts of scientific topics with an eye toward the future. Planned are talks by scientists, engineers and futurists, planetarium shows, a children’s stage show and hands-on activities, including crime scene investigation.
Events are free to all ages. You can watch for a list of speakers and schedule online. Past speakers have included NASA engineers and scientists, and professors from several universities.
Event: Dahlonega Science Festival
Location: University of North Georgia Dahlonega Campus; Dahlonega downtown businesses
Dates, times: March 6-8, 2020; event times to be announced
Admission: Free to all ages
Directions: an hour’s drive from Crossing Creeks
Hippie Fest 2020
Here’s a happening that’s far out, but not far away. Hippie Fest is a 1960s déjà vu at Uncle Shucks Corn Maze and Pumpkin Patch in Dawsonville, Georgia, just a 1¼ hour’s drive from Blairsville. It will happen rain (just like the 1960s Woodstock festival) or shine on Saturday, March 14, and Sunday, March 15.
Stroll through the scores of vendor tents in search of that perfect tie-dye shirt. If you can’t find it, just mellow out, because you can tie-dye a tee at the show. If it’s been years since you’ve seen a rear-engine VW bus or an early air-cooled Beetle, you’ll see quite a few at Hippie Fest’s car show, which runs both days. There are prizes for car show participants, including Most Shagadelic and Most Psychedelic vehicles, and Grooviest Bug.
Family-friendly music and entertainment will be presented live each day. You’re welcome to bring your own lawn chair. You can even bring your dog and let him groove (but clean up after him, please). Food and drink are for sale.
Hippie Fest may not attract the multitudes that flocked to Yasgur’s Farm, but maybe that’s because tickets are limited. You must reserve tickets online.
Event: Hippie Fest 2020
Location: Uncle Shucks Corn Maze and Pumpkin Patch, 125 Bannister Road, Dawsonville, GA 30534
Time/Dates: Noon-7 p.m., Saturday, March 14-Sunday, March 15, 2020
Admission: Single day, $11.30 (including fees); two days, $16.45; children 10 and under, free.
Tickets: Limited availability. Reservations required online.
Camping spaces: Boondock only. Sold out.
Directions: 1¼ hour’s drive from Crossing Creeks
Suwanee American Craft Beer Fest
This will be the 10th year for the Suwanee American Craft Beer Fest in Town Center Park in Suwanee, about a 1¾ hour’s drive from Crossing Creeks. The festival, on Saturday, March 14, 2020, bills itself as Georgia’s largest craft beer festival. Only three days before St. Patrick’s Day, the festival doubles as a day for wearin’ the green.
Admission entitles ticket holders, who must be 21 or older and have a photo ID, to sample any of more than 300 craft beers, including some new releases. Food is for sale, as are nonalcoholic beverages. Reduced-price designated driver tickets, available with general admission tickets, do not include tasting. VIP tickets include noon admission, a goody bag, souvenir tee shirt, guided tours and use of private rest rooms. Designated driver tickets are not available with VIP tickets.
Event: Suwanee American Craft Beer Fest 2020
Location: Suwanee Town Center Park
Time/Dates: Saturday, March 14, noon-5 p.m. (VIP); 1-5 p.m. (general admission).
Admission: General admission, $50 online (rising to $55 on Feb. 23); $60 at gate. Designated driver ticket (must be purchased by buyer of general admission ticket), $15. VIP, $110.
Pets: Certified service dogs only.
Smoking: In open areas only, not near tents.
Directions: 1¾ hour’s drive from Crossing Creeks
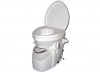
If you really hate emptying the black tank on your RV, consider switching to a composting toilet. Yes, you have to empty it, too, but it’s not as messy or as smelly.
The big difference between the composting toilet and a system that uses water is that urine and solid waste are collected separately in the composting toilet. That means the results are not as offensive.
You won’t have to use your black tank at all.
Composting toilets are safe—so safe that they are installed in many national parks. Solid waste in small quantities is treated much the same as disposable diapers, and urine, if disposed of properly, is not considered hazardous.
A good composting toilet costs about $950 and up.
Installing a Composting Toilet
No water hookup is needed for the toilet itself because it doesn’t use water. A composting toiler just sits on the floor, without the need to connect to water, waste outlets or even the floor. You will need an electrical outlet to run the toilet’s small fan, and you will need to drill through a surface of your camper for a small ventilation line.
The biggest question may be what to do with your old water-operated toilet. You can just leave it in place, but that may limit the space for the composting toilet. If you remove the old water-operated toilet, you’ll have to disconnect and properly seal off the plumbing—one line only, since a toilet uses only cold water—and you’ll have to cover and seal the opening to the black tank.
An RV center can supply the parts you’d need, or it can do the whole job for you. Store your water-operated toilet so you can reinstall it if you ever sell your RV.
The composting typically requires partial assembly—unwrapping it from packing material, putting the tanks in place and possibly attaching a handle for the composting bin.
Using a Composting Toilet
You must set up the toilet for use by adding coconut fiber (sometimes called coco coir) or peat moss in the solid waste bin, hydrating the material before spreading it out at the bottom of the bin. This must be repeated after each dumping.
Using a composting toilet requires sitting. Men and boys will not be able to stand and urinate because doing so would mix liquid and solid waste, which would affect the neatness and purpose of composting. Mixing would create a stench, so children must be trained to use the composter properly.
A plastic bottle collects urine at the front of the toilet.
A larger composting bin collects solid waste beneath the bowl. Organic material, such as coconut fiber or peat moss, is placed in the composting bin to collect an mix with solid waste. For two people, a block of peat moss will probably last a year, or close to it.
Each time solid waste is put into the bin, you must turn the handle to mix it with the organic matter. That’s how odors remain in check.
Advantages/Disadvantages
Advantages
- You will eliminate black tank odors, since you won’t be using the tank.
- You’ll have no need to empty a black tank—ever.
- You are likely to need to dump solid waste less often—perhaps every 3-5 weeks—than you would a black tank.
- You’ll use less water without a water-operated toilet, so your fresh-water supply will last longer.
- Emptying both the urine bottle and composting bin are relatively easy.
- Composting toilets are portable, so you can use place one outside—say, inside a small tent.
Disadvantages
- There’s that sitting regimen, which some men may not like. If you have bad knees, you may want to securely install a grab bar near the toilet.
- You’ll have to empty the urine bottle more often than a black tank. Having extra urine bottles is advisable. They have screw-on tops, so they don’t leak. Solid waste and the composting material get dumped into a 13-gallon plastic trash bag, or better, a compostable trash bag, so you’ll need to keep plenty of the right size.
- You’ll have to find places to properly dispose of the waste—not as difficult as it sounds, but still a requirement.
Where To Dispose of Waste
To be absolutely safe, you may want to contact the environmental agency in any state where you think you may have to dispose of waste. The federal EPA lists state agencies online. Regulations also may vary by park, and by municipality, so check with them.
Dumping Urine:
Here are some places you should be able to empty the urine bottle from your composting toilet:
- At a dumping station. This is a sure place for safe disposal.
- Anyplace you can urinate. So, a public toilet, such as those in a national park, or a toilet in a fast food or big box store, could take urine from a bottle. Carry your bottle in a backpack or tote so it’s not noticeable. Men, use a stall.
- On the ground. Not just anywhere is acceptable, but many places are. Dirt roads in remote spots are good. Avoid paved surfaces, areas near other campers and ornamental vegetation. Think about where you’d urinate in the wilderness and use such an area for dumping urine. Pour over a wide area.
- Away from waterways. Urine should be dumped at least 200 feet from waterways. One bottle may not hurt, but repeated dumping by many campers would. Just don’t do it.
- Away from storm sewers. The pipes in storm sewers dump into rivers or lakes without treatment. Storm sewers should never be receptacles for urine or other human waste. Again, one bottle may not be harmful, but if everyone dumped this way, it would be.
- Never on private property without permission.
Dumping Solid Waste:
Solid waste as it comes from a composting toilet is not yet truly compost. That takes time. But it is not considered hazardous by the EPA. Your bag of waste and fiber is the same classification as solid waste or municipal waste. It’s actually not as bad as a disposable diaper, which mixes solid waste with urine and contains more non-biodegradable plastic.
If you buy a vented, extra base (about $300), you can set it aside an allow it to completely compost before dumping. That’s the ideal method.
Here are places for dumping solid waste:
- In the compost pile at a park or campground. One is typically available.
- In a trash receptacle. Place the waste inside a plastic or compostable bag before placing in a trashcan or dumpster. Landfills accept this as a type of municipal waste. It is not against the law, or else millions of moms and dads would be picked up for using disposable diapers.
- Burying. Some parks may bar this, but generally speaking if you’re in a wilderness area, you may dig a cat hole a least 8 inches deep and bury solid human waste, the same as you would if defecating outdoors while camping. The smaller the amount, the better. The bigger the amount, the deeper the hole should be. For multiple burials, use different spots.
Always read the instructions that come with your toilet. Not all models are the same. And check with EPA regulations before you dispose of waste.
Photo Credits: natureshead.net