Welcome to Crossing Creeks RV Resort & Spa in the heart of iconic Blairsville
14 Things To Consider If You’re Thinking of RVing with a Dog
Written by Matt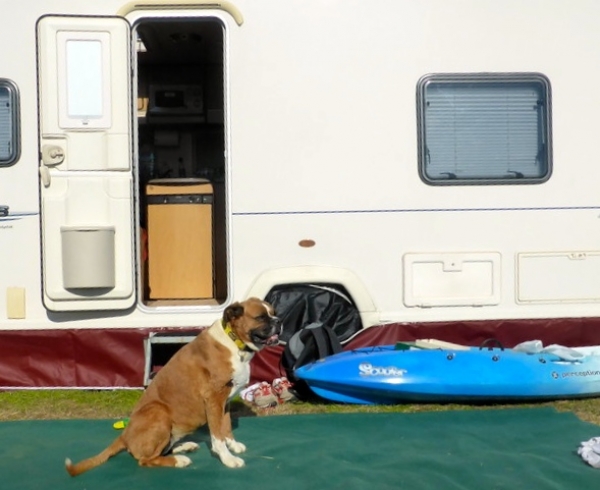
You know if you’re a “dog person” or not. So do dogs, usually. They’re often as interested in having you pet them as you are in doing it.
But it’s one thing to know a dog you like a lot, another to have a dog in your stationary home full-time, and still quite another to hit the road with Rover—full-time or even for just a few weeks at a time.
Is traveling with a dog a bad thing? Far from it—especially if you’re otherwise traveling alone. More than 60 percent of RVers take a dog along, according to the Recreational Vehicle Industry Association. Dogs are great company, and they’re loyal, loving creatures. And they definitely increase your security. But don’t fool yourself: Dogs are a big responsibility for any RVer.
Before you go RVing with a dog, answer some questions.
If you haven’t had a dog:
- Do you like dogs enough to have one with you 24/7? To feed it, pet it, groom it?
- Can you afford a dog? Even on the road, dogs need vet examinations, shots, maybe routine medicine, and healthy food, not table scraps. It’s not unusual for a dog to cost $100 a month or more. Over its lifetime, Money magazine reported, a dog will cost about $14,500 to almost $16,000. That would pay for a lot of RV repairs.
- Are you willing to train your dog or have it trained? An unruly dog can be a legal and social liability.
- Can you tolerate the messiness of a dog—the fur it sheds, the unpleasant odor of a dog in need of a bath (ah, thank goodness for the otdoor shower!), the slobber, and the teething (and chewing) that a puppy goes through?
- Are you willing to exercise a dog daily? Many dogs need exercise more than once a day. Are you willing to play with it? You may have to take extra time on fueling and provision stops to walk the dog—although the walk will do you good, too.
- Are you willing to make the effort to find dog-friendly RV parks, some of which charge an extra fee for dogs?
- Are you willing to kennel your dog or pay for and allow a dog sitter into your RV if you plan to travel without your pet—say, to visit friends or go tent camping for several days? (You can install a keypad security system that accepts a temporary visitor password.)
If You Already Have an RV:
- Do the RV parks you’re accustomed to using allow dogs and have facilities for dog play?
- Is your RV accessible to dogs? Could a small dog get up the steps? Could a big dog fit comfortably through the doorways?
- If your RV is a trailer, are you willing to have your dog ride with you in your tow vehicle, properly restrained? After all, dogs are as unsafe in a moving trailer and a moving vehicle as a person would be.
- Do you have means to keep your RV cool if you’re not there? You must have or add a rain-hooded exhaust fan with a thermostat and opening windows to maintain the temperature at or below 76 degrees.
- Does your RV have room for your dog to be comfortable under all conditions, even if you can’t open the slide-outs when you’re parked overnight? RVing with a dog may require you to compromise on the size of dog you buy.
- If you don’t allow a dog to use furniture, is there enough floor space for him to rest comfortably on a dog bed or blanket and for you not to think he’s in the way? Does it have room for water and food bowls?
One Last Question
- Are you willing to take and give unconditional love? Dogs give it. You should return the favor.
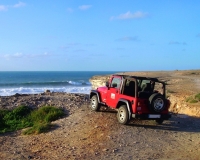
Photo Credits: Andre Boeni (flickr.com)
Crossing Creeks Is So Close to Wine Stomps, You Can Almost Smell the Bouquet
Written by Matt
Now, there really was no excuse for Lucille Ball and the Italian grape stomper to get into a fight in the grape vat on “I Love Lucy.” But, hey, stuff happens—especially with Lucy.
In Northern Georgia, starting in late summer and continuing into the fall, you can get in on the act, all while enjoying your RV at Crossing Creeks RV Resort and Spa. Crossing Creeks is a Blairsville neighbor of one grape stomp, 45 minutes from another and about an hour from two more. If you don’t get out there and enjoy the grape harvest and the grape-crush ritual, as Ricky Ricardo would have said, “You got some ’splainin’ to do.”
Yonah Mountain Vineyards Crush Fest
This year’s event, on Saturday, Aug. 24, is the 10th annual Yonah Mountain Vineyards Crush Fest. About 5,000 people turn out to hear local bands, sample the vineyards’ wine, dine on fare from select food trucks, and, of course, stomp grapes.
The grape crushing at Yonah Mountain adds a personal touch: Owners Bob and Jane Miller serenade grape stompers with their own accordion and guitar music at 12:30, 2:30, 4:30, and 6:30 p.m. Live music is performed from 11 a.m., alternating every half-hour between the Atlanta Pipe Band and the Atlanta Pro Drumline.
Yonah Mountain Vineyards is near Cleveland, Georgia, about an hour’s drive from Crossing Creeks.
- Event: Yonah Mountain Vineyards Crush Fest
- Location: 1717 Hwy 255 S, Cleveland, GA
- Date: Saturday, Aug. 24, 2019
- Times: 11 a.m.-7 p.m.
- Admission: Free, age 16 and under; $25, age 17 and older without wine tasting; $40, includes souvenir glass, tasting of four 3-oz. wine samples (age 21 and older); $35, Yonah Wine Club members. Tickets at the gate.
Paradise Hills Grape Stomp Fest
Just an 8-mile drive from Crossing Creeks, outside Blairsville, is the 6th annual Grape Stomp Fest at Paradise Hills Winery Resort. Paradise Hills not only celebrates the harvest and crush, but also goes all-in on Lucy lore. Every year, a contest matches costumed Lucy imitators against one another. The “I Love Lucy Look Alike Contest” runs twice during the day, at 2 and 4 p.m. Best costume wins wine.
There’s much more to the day than the crush. Live music plays all day. Available for purchase are crafts (including a kids’ corner), wine, craft beer and local barbeque.
- Event: Paradise Hills Grape Stomp Fest
- Location: 366 Paradise Road, Blairsville, GA 30512
- Date: Saturday, Aug. 31, 2019
- Times: 11 a.m.-6 p.m.
- Entry times: 11 a.m.-3 p.m. or 3-6 p.m.
- Admission: Tickets: $15, under age 21, includes one non-alcoholic drink; $25, age 21 and over, includes souvenir glass and tasting, or one wine or craft beer.
Kaya Vineyard & Winery Spirit of Harvest Festival
How much do you know about wine? Trivia is part of the entertainment at the Kaya Vineyard & Winery Spirit of Harvest Festival in Dahlonega. The 2019 crush is on Saturday, Aug. 31, from 11 a.m. to 5 p.m.
The winery is about a 45-minute drive from Crossing Creeks.
Attendees will have the opportunity to observe or participate in the crush, and to hear discussions of winemaking at the crush pad. Live bluegrass and folk music will play throughout the event. A Kaya trivia contest from 11 a.m. to 3 p.m. places the names of players who answer all questions correctly into a drawing. The prize: a Kaya wine tasting for two.
A raffle benefits the Georgia Veterans Day Association. The drawing is at 3:30 p.m.
Food and beverages are available for purchase. Admission without wine tasting is free, although non-ticket holders must pay $5 for parking.
- Event: Kaya Vineyard & Winery Spirit of Harvest Festival
- Location: 5400 Town Creek Road, Dahlonega, GA
- Date: Saturday, Aug. 31, 2019
- Time: 11 a.m.- 5 p.m.
- Admission: Free without tasting, but $5 for parking; tickets: $25, includes a souvenir glass, 5 tasting tickets, grape stomping, presentation on harvest season.
Stonewall Creek Harvest Stomp
Will you always remember that first crush? Well, maybe as long as your souvenir T-shirt from the Harvest Stomp at the Stonewall Creek Vineyards does. The festival near Tiger, Georgia, comes with a twist: After you stomp grapes, you can deliver red footprints on a T-shirt and take it home. This year’s stomp is Saturday, Sept. 28, from noon until 5 p.m.
Live music plays throughout the day, and barbeque is available for purchase. If you don’t want to buy food, bring your own picnic lunch. Paid admission includes not only the tee, but also a wine goblet, a tasting of four wines and a wine cocktail. Reservations are recommended to ensure that you get a T-shirt.
Stonewall Creek is just over an hour’s drive from Crossing Creeks, on a scenic route that takes you past Lake Hiawassee on U.S. 76.
- Event: Stonewall Creek Harvest Stomp
- Location: 323 Standing Deer Lane, Tiger, GA
- Date: Saturday, Sept. 28, 2019
- Times: Noon to 5 p.m.
- Admission: Tickets: $35, adults, includes goblet, tee shirt, four wine tastings, wine cocktail; $10, children. To reserve T-shirt: www.eventbrite.com or phone 706-212-0584.

Being connected is how we live. We go online to get directions, do our banking, shop, share with friends, keep tabs on family, play games, access music, and watch TV or movies. It’s also been reported that teens need Internet access just to breathe, although evidence is merely anecdotal.
Setting up Internet connections in an RV is different from what’s needed in a stationary home.
You probably look for campsites that have Internet access. You’re OK if the campsites are hardwired, although speeds may be slow. If they’re not wired, and you must rely on the camp’s WiFi, you’ll probably be tempted to take a less desirable campsite to ensure a strong signal, but the feed may be slow anyway.
The only other way to find free access on the road is at libraries and some businesses with free WiFi, typically fast food joints and businesses with waiting rooms. That may help you keep tabs on your email, but it’s not an especially secure way to pay bills.
Much better is having your own data coming in or at least being able to enhance the camp’s signal.
What You Need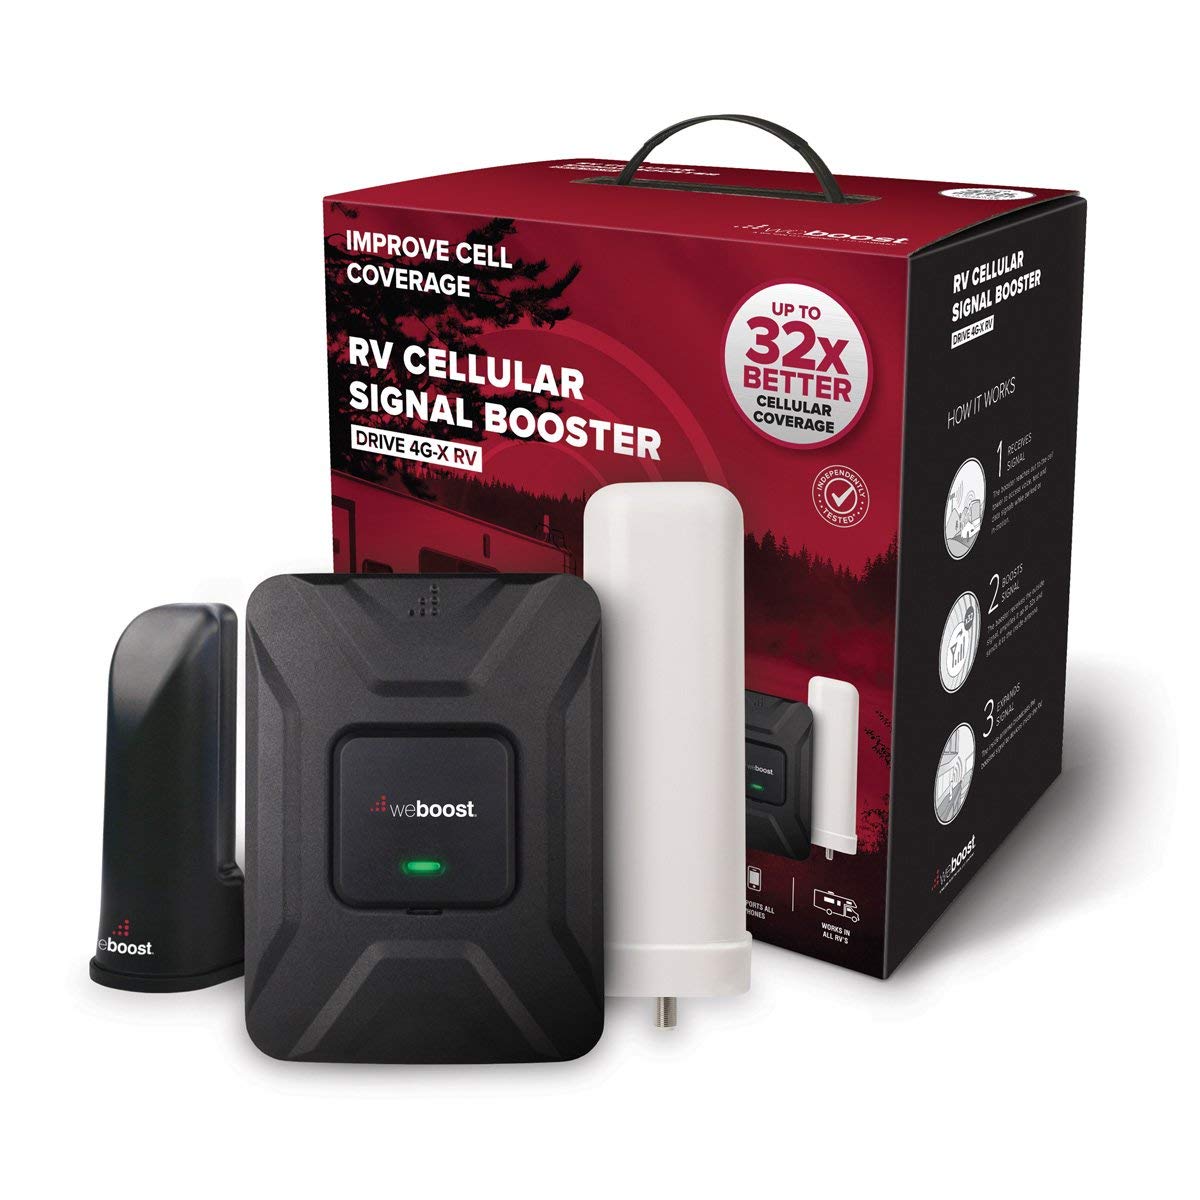
You spend a lot of time outside the RV while camping, so the signal needs to be strong not just inside your RV, but also nearby. Here are the things you’ll need to reliably access the Internet from your RV and campsite:
- A data source for connecting to the Internet.
- An antenna.
- Signal extender.
- Some way for devices to link to the signal.
- Power cable for the antenna.
- Router and Ethernet cable if you want to connect a device physically.
Choosing a Data Plan
On the road, you can get data delivered reliably to your RV only by paying for it. You can tap that data with the proper equipment, but you’ll probably have to increase the maximum data available. Tablets and computers, streaming services and game consoles gobble up data.
If you vacation only a month or three each year, you can buy only as much data as you need the rest of the year and pay for extra data in the months you travel. You will need extra especially if kids are streaming music and movies, watching TV, gaming and chatting. Extra data also is advisable if you work online from your RV or watch a lot of TV.
Beware data plans labeled “unlimited.” Only in our age of steadily decaying consumer protections could something be called unlimited and still incur extra charges for data—but some data plans do just that. Read the fine print.
Antennas, Accessing the Web
An antenna to pull in a signal is often roof-mounted for optimum reception. Omni-directional antennas take different forms, from painted metal to plastic-coated, and sometimes encased in a larger plastic enclosure. Antennas add height, but no more than a hooded fan. Still, you’ll have to avoid damaging an antenna on overpasses or branches. Position an antenna away from other roof-mounted accessories to avoid interference.
Exterior antennas are designed to resist dust and water intrusion from spray, but even enclosures designated IP65 will not resist water jets, so take care when washing. Seal any mounting holes or openings for cables with Dicor or a sealant approved by your RV manufacturer.
Some RV antennas are also a signal extender. They strengthen incoming and outgoing signals. With an extender, you can be farther from a cell tower and still get a usable connection. If you have no data plan, an extender amplifies WiFi signals from RV parks and businesses.
Some tablets and any smartphone can link wirelessly with a password, and many smartphones can also serve as a hotspot, allowing Bluetooth-enabled devices to link through the phone to access the Internet. A separate portable hotspot (often called a jetpack) costs $200 or less. The optimum solution for multiple devices, or if you want an Ethernet connection, is to install a router to distribute the signal from the antenna. Combination signal extender/routers also are available.
Channel Bonding
Channel bonding isn’t necessary, but it can help prevent dropped calls and buffering while streaming. It helps maintain connectivity when you are beyond official coverage zones—ideal for boondocking. Uploading and Skyping also will be stronger.
Bonding combines any channels on which you receive data to produce one stronger signal that’s sent over your own virtual private network (VPN). So, if you have a cell signal, an Ethernet signal and a WiFi signal, or, say, an AT&T and a Verizon signal, plus a WiFi signal from the RV park, bonding will enjoin them on the network side and result in faster throughput. An example is Speedify. It’s available in one-year subscriptions if you’re full time or close to it, or monthly if you only vacation in your RV.
Photo Credits: weboost.com

Older RVs and tow vehicles may lack some of the newest electronic accessories, including one of the more useful innovations, the backup camera. With wireless technology, it’s actually quite easy to add one.
The rear of a travel trailer is a great spot for a backup camera, but it’s a place not likely to have one. A backup camera will make backing into a campsite and just turning around much easier. It also will make highway driving easier because it can serve as a rearview mirror, displaying what’s behind your trailer.
A wireless setup is ideal for the rear of a trailer—the camera and sending unit behind the trailer, and the viewer inside the tow vehicle. You also can get wireless systems that add cameras to the blind spots of trailers or motorhomes. Wireless range may be as high as 70 feet.
Wired cameras for trailers with up to 50 feet of wire are available, but you must decide if you want to do an installation on that scale. Remember, you would have to wire the length of the trailer and the length of the tow vehicle, plus connect at the hitch.
A wired camera is better used on a motorhome or for mounting a camera to work only for a tow vehicle. Wired units generally are cheaper but take more time to install. A camera on the tow vehicle itself will help when driving the truck alone, and maybe during trailer hitching, but it won’t help you see behind the trailer.
Costs Range Widely
You can get a camera for less than $20, but you’ll probably have to supply a monitor, and the image quality will be low, especially in extreme lighting conditions. Kits with both camera and monitor range from about $60 to the mid-$200 area for wired types, and from about $100 to $400 for wireless, with the monitor size and features affecting the price. Wireless systems with extra cameras for blind spots, useful on large motorhomes and trailers, are available for about $500 but can top $900.
Available Features
Mounting Method - Cameras can be mounted by drilling through your vehicle’s or trailer’s body, by using pressure-sensitive tape, or by mounting atop or in place of the license plate frame.
Display Type - You can buy separate camera and monitor, camera-and-monitor kits, or cameras that beam their signal to your iOS or Android smartphone. Displays typically increase with screen size, 4.3-, 5- or 7-inch. Some displays replace your rearview mirror, with widths between 7 and 10 inches. They work like traditional mirrors when not powered up.
Sensor Type - CMOS sensors provide a lower-quality image, but they’re cheaper. CCD sensors provide good images even in low or bright light, but they cost more.
Reverse Image - The view looks like what you see in your rearview mirror—highly desirable.
Auxiliary Lights - Some cameras get help at night from small lights. Infrareds are best.
Lane Departure Warning - Another feature not available on earlier model vehicles, lane departure alerts you if you stray into another lane.
Recording and Playback - Look for this if you want a record of your driving.
Backup Grid - Lines guide you in backing up straight. Original equipment cameras typically have this feature.
Instant Power - As on new vehicles, the camera goes on as soon as you shift into reverse.
DIY or Installed?
Experienced do-it-yourselfers can probably handle installation, but bigger wired systems may be better left in the hands of a shop. You may balk if your camera requires drilling; make sure it properly seals out water to prevent rust, and use a quality drill bit from a name brand, such as Black & Decker, Dewalt or Milwaukee. You may have to splice into your vehicle’s wiring with some systems, and definitely for automatic power-on, so make sure you’re comfortable with that. Expect to pay a shop’s normal hourly rates for installation.
RVers are always looking for free overnight parking to save a few bucks. There are thousands of options, but you’ll have to do some homework to find them.
Always ask permission at any location. Sometimes chain restaurants are owned by franchisees who set their own policies. And sometimes a local ordinance bars a store from living up to what is normally a chain policy to allow RV parking overnight.
Whenever you park overnight, be courteous, quiet and clean. Quiet means no generators, no parties and no music. Take as little space as possible—no awnings, pop-outs or barbecue grills. Park where you’re supposed to. And no dumping tanks (do we even need to say this?) or leaving trash behind. Avoid using jacks, which could damage parking lot surfaces.
Here are some tips.
Truck Stops
Can you park overnight at a truck stop? Usually.
Should you? That’s a decision you have to make.
Flying J, Travel Centers of America and Love’s typically allow RV overnight parking. The simple truth, however, is that truckers don’t like having to deal with RVs taking spaces they believe are theirs. In fairness, they’re trying to make a living, and in most cases, you’re trying to take a vacation. Priorities, if you know what we mean.
At a truck stop, you may have to deal with idling diesels, especially in winter. If the stories are to be believed, you also may get parked in by truckers upset with your presence.
Use your head. First, ask at the counter if you’re welcome and where you should park. You may be directed to the truck area, an RV area or car spaces. Forgo facilities such as the showers that are intended only for professional drivers.
Return the favor: Buy your fuel there if you overnight and supplies you may need, and use the restaurant if you need breakfast before hitting the road.
Business Parking Lots
Quite a few businesses allow RVs overnight. Among them are Camping World, which caters to RVers, and Walmart/Sam’s Clubs, which will be glad to sell you whatever you need for your journey. Some restaurant chains that target travelers, such as Cracker Barrel, also allow RVs overnight.
Casinos with huge lots typically say yes to RVs. They get RVers all the time, and casinos are always glad to take your money (and usually do). Casinos have proliferated, so find out about one you may be planning to visit or merely park at.
Some sports stadiums allow parking when there’s no game, but they may charge a fee and they may not allow overnight stays. Visit their websites or call to find out.
Again, if you are allowed to stay overnight, return the kindness by patronizing the establishment. If the only gambling you do is driving on less than a quarter tank of fuel, consider dining at a casino. They’re open 24 hours; the food is usually pretty good and, for the amount a buffet offers, inexpensive.
Parks
RV overnight policies vary by locale, and by state. You may be able to find RV-friendly parks online by checking municipal rules for various locations along the route you map, and by visiting the municipality’s website.
State parks may charge a fee, but some have facilities for dumping tanks or topping up with water.
Rest Stops
This varies by state, and usually by highway within the state. In Ohio, for instance, RV overnighting is allowed at stops on the turnpike but not at stops along other highways.
At rest stops, you’ll be parking just for the sleep and the toilets. Some, however, do have facilities for emptying tanks, and for refilling your water tank.
Good Resources
Consider these two books. They’re previewed on Amazon. The Wright guide is especially helpful in finding cheap or free overnight camping or parking. Both list seasons and hours of operation, approximate fees, pull-through availability, amenities and the number of sites that include them, directions, phone, website and reservation details.
“The Wright Guide to Free and Low-Cost Campgrounds” by Don and Joyce Wright. $25-$35. Listed state by state are campgrounds that cost less than $20 per night $12 or less in earlier editions). The guide includes regulations for overnighting at rest stops. The book is updated periodically.
“RV Camping in Corps of Engineers Parks,” Roundabout Publications. $15-$20. Only campgrounds that accept RVs are listed, and there are more than 600 in 34 states, many with lakes. Camp prices vary, but many are inexpensive.
Overnightrvparking.com. For $24.95 a year, you can consult this site, which says it lists 14,144 free overnighty parking locations for RVs.
We all love the latest gadgets, and more importantly, what they can do for us. Few of us want to live without cell phones, GPS-based directions or rechargeable devices.
There are, however, a few examples of old technology that remain useful in an RV.
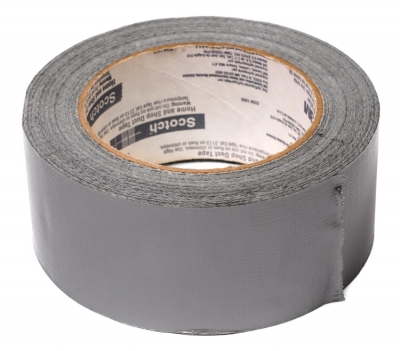
Duct Tape
Now, some of you may think of duct tape as the greatest invention of all time. That’s probably the wheel, but the silvery adhesive aid is one simple, inexpensive, versatile invention. It’s great to have a roll on hand.
And why not? In World War II, this water-resistant, strong tape was used to keep ammo dry by sealing ammunition boxes. When the Apollo XIII moon mission was crippled by an explosion, it sealed up the makeshift oxygen system that astronauts cobbled together and helped to save their lives. Anything that helped win the world’s biggest war and bring three endangered astronauts back from the dark side of moon has merit.
You’ll appreciate duct tape if a piece of trim comes loose and you want to keep it from flapping as you drive. And you’ll thank the stars that you have a roll if a fender bender has your bumper cover dragging. (People have held bumper covers up for months with duct tape.) It will also at least slow a hose leak.
You also may want to buy a role of quality gaffer’s tape, which is used on movie sets. It’s cloth-backed but unlike duct tape has no plastic backing for water resistance. Gaffer’s tape, which delivers a strong bond, leaves no or reduced residue, making it great for interior use.
Bungee Cords
Like duct tape, bungee cords are great in a pinch. The elastic cords, with metal or plastic hooks on the ends, come in different thicknesses and lengths.
A carefully installed bungee cord also will hold up that bumper cover. It will keep cabinet doors closed when a latch beaks. A bungee cord will secure bikes to a rack and stop that annoying rattle from a loose item in your storage area. We personally know of a case where a tiny bungee held a loose cover to the master cylinder of a poorly maintained rental truck for the length of an interstate move. Buy multiple sizes so you’ll find a cord for whatever pops up, so to speak.
CB Radio
The days of relying on a CB radio for directions, traffic conditions and plain old chatter are long gone.
But CB radios—that’s Citizens Band, for the uninitiated—can be a useful emergency tool. Most police no longer monitor CB transmissions for emergency calls, but those that do still listen to Channel 9 are probably in remote rural areas. If you’re trying to deal with a flat tire where there’s no cell tower, a CB radio may do the trick.
Paper Map
Electronics rule where road maps once were king. But the accordion-fold paper map, spread out across your table at the local diner, or a good road atlas will give you the big picture one heck of a lot better than your tiny cell phone screen will. And where there are sporadic or no cell phone signals, a paper map is all you’ve got. It’s cheap and takes little space. Keep one handy.
Alkaline Batteries
Throw-away batteries are passé, but in an emergency, they can be a godsend. For one thing, they’ll last longer than the power in a rechargeable flashlight. If a mechanical issue prevents recharging, a flashlight with a couple of long-lasting alkalines will keep you going—just like that bunny on TV.
Having a vehicle smaller than your motorhome at the ready when you’re set up at a campsite is a major convenience. It’s easier to drive a smaller vehicle to get groceries, visit a friend, see a movie or venture off road.
If you camp in a fifth wheel or trailer, secondary transportation isn’t an issue. You just drive the unhitched tow vehicle.
For RVers driving a motorhome, it’s a different story. Unless the motorhome is a toy hauler, you have to tow a vehicle. Dollies and trailers can be difficult to maneuver, and trailers add weight—and work. That makes flat towing—also called four-down or dinghy towing—the best solution.
Finding a vehicle that won’t be damaged by rolling along on all four wheels takes work. Only some vehicles can be flat towed, but quite a few are affordable, especially when used. Every vehicle will need a tow bar plus wiring and braking add-ons.
Transmissions Challenged
A dinghy vehicle’s transmission and transfer case must continue to be lubricated as it rolls with the engine off. There’s no absolute rule here. Some vehicles can be towed thousands of miles, some a few hundred and only below a certain speed. Some models may be flat towable in automatic and manual transmission models, and some in one but not the other. Generally speaking, an all-wheel-drive or 4-wheel-drive vehicle must have a transfer case that can be shifted to neutral. Take note: With electronically controlled transmissions and transfer cases, traditional rules don’t apply.
Edmunds.com, a reliable site that reviews and lists equipment available on new and used vehicles, says that among the things you must know to flat tow are whether to pull fuses and which ones, what must be switched on or off, how to position the shift lever, and how often you must stop and run the engine for lubrication (sometimes as often as every six hours). In general, ignition switches are placed in the “accessories” position so the steering wheel will turn.
Still, you have to know which vehicles are flat-towing approved.
Dinghy-Towable Vehicle Lists
First, decide the kind of vehicle you want. Do you just want a car that can be towed, then driven into town? Or do you want an all- or 4-wheel-drive SUV or truck that can take you off road?
Then consult a list, such as the list from Motorhome.com, which has dinghy vehicle guides going back to 1990. Downloads are free. Goodsam.com also publishes the list. The 2019 guide lists 65 vehicles, from subcompact cars to 4-wheel-drive pickups. It tells you speed and distance limits, plus what needs to be done before towing.
Talk only to industry people you absolutely trust:
- Dealerships. Don’t ask just any car salesman. Let’s face it: Some salesmen are knowledgeable and some know less about cars than your dad taught you when you were 10. A few just make stuff up to get sale. Even if he doesn’t offer what you need, one you trust might have suggestions.
- RV dealership. Ask about dinghy towing but emphasize that you want a car that is manufacturer-approved for four-down towing.
- Your mechanic. Mechanics see and hear a lot. If they have seen two or three of a model that fail even though the factory approved them for dinghy use, they’ll tell you. And if they don’t know, they’ll probably tell you that, too.
Check the Owner’s Manual First
Before you buy any vehicle for dinghy use, check the owner’s manual for that make, model and year. Edmund’s says an owner’s manual will explain whether a vehicle is approved for dinghy towing and how towing must be done. “Check the manual,” Edmunds emphasizes, “then check again.” Remember: Dinghy approval for a model can change from year to year, so get the right year manual.
Owners manuals, even for past years, usually can be found online by searching “year make model owners manual.”
Modifying for Dinghy Towing
Can you modify a vehicle for dinghy towing? Technically, yes. An RV dealer can do the work. But it’s risky. Modifications may not protect the vehicle’s transmission, transfer case or electronics as the accessories maker claims. Modifications also will invalidate the vehicle manufacturer’s warranty, so if the vehicle fails, you’re out a ton of money.
Many factors that influence tire replacement on an RV are identical to those for other vehicles, but one stands out as decidedly more relevant to RVs: tire age.
Why? RV tires may deteriorate before the tread wears out if they’re old. RVs travel fewer miles than daily drivers for most people, so the tread often remains high, even after years of use. Sure, some RV owners—especially nomads who live on the road—drive 10,000 miles a year. But the average RV owner drives less than 5,000 miles yearly, according to Guaranty RV Super Centers, an Oregon-based chain of RV dealers.
A 5-year-old tire may not show much wear at 25,000 miles, but what kind of shape is it in? It’s possible that a tire with half its tread will begin to show sidewall cracks, largely from the ultraviolet rays in sunlight and from atmospheric ozone, but also from the stress of heavy loads, the heat from high speed, and improper maintenance and storage.
Check the manufacturing date on each sidewall—the last (right-hand) four numbers after the DOT marking. The first two of those numbers are the month and the last two, the year. For example, a tire stamped “0110” was made in January 2010. Michelin recommends having the tires checked when they’re 5 years old.
By the seventh year, or if signs of non-tread wear show before then, consider getting new shoes. If tires check out, keep running them. When replacing just two tires, place them on the same axle at the rear.
Here are steps to make your tires last:
Maintain Proper Pressure
Go by the tire manufacturer’s inflation recommendation. Don’t overload your tires, and just as importantly, don’t underinflate. Goodyear says every pound of under-inflation decreases a tire’s ability to carry 20 to 30 pounds of payload. Goodyear recommends checking pressure when tires are cold, before and after each trip (even short ones), when TPMS indicates a problem, and monthly during storage.
Don’t Overload Your RV
An RV that’s too heavy unduly stresses tires. It also can degrade handling. Distribute contents as evenly as possible to avoid stressing just one tire. Weigh your RV while it’s loaded (and with full tanks) on a truck scale.
Rotate Tires
Tires wear more evenly and last longer as a set if they’re rotated. Including your spare in the rotation ensures that it won’t age beyond its useful lifespan. Check your RV owner’s manual, but as a guide, rotate yearly.
Keep Tires Balanced
Tires should be balanced when new or rotated to the other side. Unbalanced tires will ride roughly as they bounce.
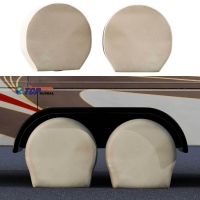
Store Your RV Properly
If possible, store indoors in a cool, dry place. Outdoors, try to find an area shielded at least part of the day from sunlight. Unload your camper. Inflate the tires to 25 percent over the recommended maximum. Clean the tires with soap and water, but avoid sealants and dressings. Place the RV on blocks if possible. Shield the tires from sunlight with covers. It may be helpful to park on a layer of plastic between the tires and pavement. To avoid flat-spotting, move the RV every three months but not in cold weather. If tires are stored indoors, keep them away from ozone-generating heat sources.
Replacing Tires
Buy tires similar or identical to those already on the RV. Match the size and load ratings of original tires. On trailers, never mix increasingly available radials with bias ply, which are being phased out. You can use bias trailer tires even if your tow vehicle has radials.
Photo Credit: tcpglobal.com
Georgia Mountain Moonshine Cruiz-In, Georgia Mountain Fair Coming in July
Written by Matt
There’s a lot to like about the 2019 Georgia Mountain Moonshine Cruiz-In, July 11-13 at the Georgia Mountain Fairgrounds, especially if the burble of a Detroit V8 is your idea of an unmatched musical treat. If country music is your preference—how do Pam Tillis, Neal McCoy, Ricky Skaggs and B.J. Thomas sound?— head back to the fairgrounds July 19-27 for the Georgia Mountain Fair.
The fairgrounds are in Hiawassee, a mere 18 miles from Crossing Creeks RV Resort & Spa, so you can stay at Crossing Creeks and venture over to the fairgrounds along Lake Chatuge for one or more days of the festivities.
Cruiz-In Has Moonshine Roots
Illegal moonshining is the inspiration for the Cruiz-In. When liquor dripped from stills tucked away among the mountains, men with hot cars and trunks full of illicit spirits did their best to outrun the law and make their deliveries. Those runs were the progenitors of stock car racing in the South. Who among those outlaws would have guessed that their lights-out midnight drives would generate a sport that’s become a national obsession?
The Cruiz-In will commemorate those runs with a much tamer parade of horsepower. The sounds of engines from cars entered in the show will reverberate off the hills of northeast Georgia as owners drive their candy-colored creations over 60 miles of rural roads.
Have a hot rod, street rod, rat rod, bike or other custom vehicle? You can have it pictured in color on an 11x17-inch poster with the Cruiz-In logo for $20 or on an 18x24-inch poster for $30. Posters can be ordered Friday and Saturday for delivery by mail.
And there’s a real still at work on the fairgrounds.
On July 13, three 1960s rock and pop bands will perform: the Grass Roots (“Midnight Confessions”), The Association (“Along Comes Mary”) and the Box Tops (“The Letter”).
For details see the Cruiz-In website or Facebook.
Georgia Mountain Fair
Here’s an old-fashioned country fair, mountain-style.
The Georgia Mountain Fair features everything you’d expect at a proper country celebration: arts and crafts, food, a cooking contest, a Miss Georgia Mountain Fair competition, a flower show, and, of course, lots of music.
In addition to local acts, including the Georgia Mountain Fair Band, there will be well-known chart toppers, all playing two shows: 2 and 8 p.m. Tillis will headline the musical entertainment on opening day, Friday, July 19. Neal McCoy will play Saturday, July 20. The Booth Brothers will add Gospel on Monday, July 22. Skaggs will be the feature act on Tuesday, July 23. The Spinners will take the stage Wednesday, July 24. Thomas will perform on Friday, July 26. T. Graham Brown will close out the fair on Saturday, July 27.
No Georgia fair is worth an over-ripe peach without a bluegrass day, which is Thursday, July 25, at the Georgia Mountain Fair, with Del McCoury, Mike Snider and Jeff Parker. Gospel music day is Sunday, July 21, with the McKameys, Primitives and Inspirations.
The fair offers a chance to learn a few things, too. You can visit the still, tour the old-time Pioneer Village, and take in “Old Ways Demonstrations,” where the experienced show how to make shakes (wood, not ice cream), squeeze cider, mill corn and perform other country skills.
Fair rides, which require a wristband for admission, run daily.
See the fair website for times and admission costs. Parking is free. Pets are not allowed.
Photo Credits: Facebook

RV weather seals—also called gaskets or weather stripping—are as important in warm weather as in cold, and warm weather is a much better time to replace them if you do the work yourself. Warm weather keeps rubber gaskets more flexible, making them easier to work with.
You have three very easily understood reasons for renewing weather seals before summer. Seals that are in sound condition:
- Keep air-conditioned air in your RV and hot, humid air out.
- Prevent water leaks from heavy summer thunderstorms and road spray.
- Block out insects and other pests.
Weatherstripping is likely to deteriorate around entry doors, storage compartment doors, windows, operating roof vents and slide-outs.
Installation Types Differ
Some weather seals apply with glue, often (but now always) in the form of an adhesive backing on the seals themselves. The adhesive surface is exposed when you peel off a plastic or paper cover. These seals are common on entry doors.
Seals for sliders often are fastened with glue but require an application of liquid adhesive, since they typically don’t come with a pressure-sensitive backing. Some mount in tracks on the RV.
Other weather seals press into place. Many have a slotted surface that attaches to the edge of a window or compartment door, or to an upward-facing, leak-discouraging lip on the frame of a roof vent.
Finding a Proper Gasket
Seals may differ by make and model of RV, but buying more-expensive original equipment seals usually is not necessary. Several manufacturers offer aftermarket window, door and vent gaskets in a range of sizes, styles and prices. They typically have catalogs in RV stores or online charts to help find the proper fit. For instance, if you go to manufacturer Steele Rubber Products’ web page and click on slide-outs, you’ll find single and double bulb seals of varying heights and widths, seals with fins, seals with track mount, and seals with peel-and-stick adhesive, all shown in profile. Matching a seal profile usually turns up a match.
Other replacement gasket suppliers include CR Laurence, Bling-Flagship, Lightman, Minor Rubber, Perma-Fit, Trimlok and Zoro.
Simple Installation Steps
For a proper fit:
- Watch weather seal installation videos online before proceeding.
- Find and buy the appropriate seal, using in-store or online assistance.
- Take photos with your cell phone or digital camera of the old seal as it was properly installed, then intermittently during removal, so it’s easier to reverse the process during reinstallation.
- Read the instructions included with the new seal.
- Remove the stripping.
- Clean dirt, corrosion and glue residue from the RV surface. You may need a scraper and solvent. Take care not to damage paint and decals.
- Fit the new gasket, then install by using pressure-sensitive adhesive, applying adhesive or pushing a seal into place, depending on type. Remember: It’s easier to curve flexible rubber seals in warm weather than in cold weather. Working in the shade will prevent excessive heat from fiberglass or metal surfaces.
- Using a utility knife or shears, trim the seal to fit, then apply sealant to any small gaps that may result.
When buying slider seals, make sure they’re wide enough to overlap or cover the gap between the slide-out and the adjacent, stationary RV wall. That keeps out water, dust, pests and debris.
More...
Lithium-Ion Batteries: Expensive, But More Efficient, Longer-Lasting
Written by Matt
Lithium Ion batteries, or Li-ion, are a very real upgrade as deep-cycle batteries in your RV. Although more expensive, lithium ion offers a number of advantages over lead acid batteries.
Li-ion technology is young but not new. Li-ion batteries power many cell phones, laptops, power tools, consumer and commercial drones, and gasoline-electric hybrid vehicles.
Li-ion battery advantages:
- Weigh less.
- Are smaller compared with an equal-strength lead acid battery.
- Don’t vent, so they can be stored in more areas than traditional batteries.
- Maintain amperage during discharge.
- Last longer before needing replacement.
- Allow deeper discharges.
- Charge faster, making them more compatible with solar charging.
- Require no maintenance.
- Better resist damage from heat.
- May have smart management systems to prevent damage.
- Use a non-corrosive electrolyte.
Li-Ion battery disadvantages:
- Cost 3 to 5 times more than weaker lead acid battery.
- Can catch fire if damaged.
Price versus Performance
You will pay considerably more to purchase a lithium-ion battery, but over time, costs nearly even out.
Joe O’Connor, a senior application engineer at Mercedes-Benz Energy and author of the book “Off Grid Solar,” wrote on medium.com that the initial cost per kilowatt hour (kWh) with a lead acid battery is $131. For a Li-ion battery, it’s $530—a whopping 400 percent of the cheaper battery’s purchase cost.
But Li-ion batteries cycle 1,000 times for cheaper units to 4,000 times for higher-quality cells before they fall to an 80 percent state of health, compared with just 200 to 1,000 discharges for a lead acid battery. That means they should last years longer. By the time the Li-ion battery needs replacement, its total cost is just 11 percent more than its lead acid counterpart, O’Connor’s figures show.
More Convenient, More Powerful
There’s no question about the convenience of Li-ion compared with lead acid.
Li-ion batteries require no maintenance. There’s no need to top off water as there is in the lead acid battery—a task that’s difficult when batteries are hard to reach. Skip that chore with a lead acid battery, and battery life shortens dramatically.
Lead acid batteries also fail sooner if they are discharged beyond 50 percent. A Li-ion battery can be discharged 80 percent without damage. A Li-ion battery will supply power longer on each charge than a lead acid battery will.
When a Li-ion battery is discharging, there’s much more power on tap—5 times as much available power at constant current as a lead acid battery, according to O’Connor. The available power on lead acid batteries diminishes steadily as the batteries discharge, making them far less efficient in running an RV’s electronics.
Faster Recharging
The fast charging time of a lithium-ion battery is 2 to 4 hours. That’s a fraction of the time needed to recharge a lead acid battery, which is 8 to 16 hours, depending on the quality of the battery.
A Li-ion battery is just more willing to accept a new charge—about 99 percent efficient versus 85 percent for lead acid batteries. That makes Li-ion especially attractive for solar recharging. Solar panels, like Li-ion batteries, involve a high expenditure up front, but they save money over having to recharge with a generator, which needs gasoline or diesel fuel to run and oil for lubrication. With more efficient lithium-ion batteries, a smaller—and cheaper—solar array will be just as efficient as a larger array replenishing lead acid batteries.
The Future
Batteries for off-grid use will continue to shift toward lithium-ion, with a more pronounced move away from lead acid within just a few years. Expect Li-ion prices to drop as more manufacturers enter the market, increasing competition.

If you wanted to, you could stuff a lot of money into a camper. And if you’re wondering where the money would come from, it’s from the savings you experience by using a camper instead of other forms of vacation travel. Seriously. More American families are buying and using recreational vehicles for vacations, and the savings are a big reason. A major study shows that even when factoring in expenditures for the RV, including fuel and maintenance, vacations are cheaper when families go RV camping than when they use hotels and restaurants.
It all depends on the type of RV being purchased and used, but the study by CBRE Hotels Advisory Group, done in 2018, indicates savings can hit as much as 64 percent for a family of four hitting the road with a foldout camper, and more than 50 percent for two people. Even on the lower end of savings, researchers discovered, owners of a Type C motorhome could save 21 percent for a family of four and 8 percent for a couple.
Two groups, Go RVing and the Recreational Vehicle Industry Association, financed the study. Go RVing represents RV manufacturers, RV dealers and campgrounds that work to grow RV camping. The RVIA is a trade group representing RV manufacturers and parts makers.
Income-Appropriate Comparisons
CBRE, to avoid skewing the results, compared the use of different RV types to a range of alternatives. CBRE didn’t just compare vacationing in a folding camper trailer to flying and staying in a five-star hotel. The savings would have been obvious and unrealistic. Researchers did compare the costs of buying and using a luxurious Class A motorhome to flying first class, renting a premium car, staying in upscale hotels/resorts, and eating meals in restaurants.
Other modes of travel measured were:
- Folding camping trailer.
- Lightweight travel trailer.
- Compact motorhome (not specified, but probably Class B and/or pickup campers).
- Class C motorhome.
- Traveling in a personal car, staying at hotels/motels, and eating meals in restaurants.
- Traveling by airline, renting a car at the destination, staying at hotels/motels, and eating in restaurants.
- Traveling by personal car or airline, staying at a rental house/condominium, and eating most meals in the rental.
In addition to gauging the cost for two adults/two children, and two adults alone, CBRE researchers measured costs for vacations lasting three, seven and 14 days.
Calculated Savings
CBRE researchers left little to chance. Among the other factors they considered were such ownership costs as insurance, average ownership periods, and annual days of RV use, and even residual value.
Here’s how vacation cost savings added up for a family of four, by RV type:
- Folding camping trailer: 50-64%
- Lightweight travel trailer: 31-50%
- Compact motorhome: 31-50%
- Type C motorhome: 21-43%
- Type A motorhome – 41%
Here’s the vacation costs savings for a couple, by RV type:
- Folding camping trailer: 43-53%
- Lightweight travel trailer: 20-34%
- Compact motorhome: 20-34%
- Type C motorhome: 8-24%
- Type A motorhome: 19%
Fuel Price Fluctuations
You’re probably thinking, “Ah, but fuel prices were low, so the savings could evaporate quickly when prices rise—and they’re rising now.”
It would take an exponential increase in fuel prices to erase all the cost savings, research indicates. Fuel prices would have to soar to $13 a gallon for RVing to cost more than other vacation forms, according to the study.
When fuel prices rise considerably, RVers have ways of cutting expenses rather than eliminating their RVs, the RVIA says: They drive fewer miles with their RVs by vacationing closer to home and staying longer at one location. What they don’t do is abandon RVing, the RVIA says.
The research did not include figures on the return on investment of adding a vault to an RV interior. Maybe next time.
If your tow vehicle, motorhome or trailer lacks a tire pressure monitoring system, commonly referred to by its initials, TPMS, the safety feature isn’t difficult to add. Adding TPMS is a good idea for RVers.
Losing a tire at speed is nasty business. The sudden loss of pressure—a blowout—can cause a vehicle to swerve or even to roll over. Tires that fail can also shred, and that can cause considerable damage to RV bodywork, especially aluminum bodies.
Losing a tire in the middle of nowhere on a long trip is no picnic, either. Getting a truck to come in and jack up any of your vehicles to change a tire is often far from instantaneous.
How TPMS Works
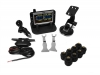
TPMS add-on systems basically have two parts—the sensors, which wirelessly send signals reflecting air pressure from each tire, and a wireless receiver, which gathers the information and displays it in any of several ways, depending on the system.
The monitor might display actual pressure in each tire, or it might simply show a message to check a tire, or all your tires. Individual readouts are the better choice.
Original equipment systems have monitors that are integrated into the dashboard. Aftermarket systems can’t do that, of course. They have monitors that attach to the instrument panel, on the surface or on the lower edge, or on a console surface. They’re reasonably attractive, so adding one won’t spoil your view of the instrument panel. Because they use their own batteries, there are no wires to run or connect.
Signals are sent wirelessly. Some sensors are mounted internally, which will cost more to mount because you’ll need a garage or RV center to do it. Then the tires and wheels will have to be balanced. The alternative is sensors that screw onto valve stems as replacements for valve stem caps. Manufacturers say there is no need to rebalance tires after replacing the valve caps with the lightweight sensors.
Some systems, in addition to monitoring tire pressure, monitor tire temperature and send readouts to the same monitor.
How Many Sensors?
TPMS kits come with different numbers of sensors and are priced accordingly. Four would cover your tow vehicle only, and not even that if it has a dually rear axle. Kits usually include a tool to help mount the valve-cap type sensor on the inner wheels.
It’s best to get a set that has enough sensors to read the pressure of each tire on your tow vehicle, your trailer and your spares. If your motorhome tows a dingy, get sensors for that vehicle, too. Look for models that offer, in addition to the sensors in the set, additional individual sensors or supplemental sets of two. That way you can get as many sensors as you need. You also can replace sensors that go bad. Regardless of where your sensors are, they’ll read out on the dash display you install as long as they’re compatible—the same brand and model.
Sensors are water resistant to help them hold up, a must if you’re towing a boat trailer. Screw-on sensors typically must be removed to add air to a tire, then screwed back on.
Lifespan
Sensors last about five years. After two years you should replace the watch-type flat batteries. Better to replace them than have them fail on a trip. Some monitors have rechargeable batteries, which don’t have to be replaced but can be recharged from the power port/lighter.
A nice thing about the screw-on type of TPMS sensors is that you can remove them while your RV is stored. That prolongs the life of the sensor and the batteries, if you remove them too.
Cost: Surprisingly Inexpensive
Costs vary by make, model and retailer. In general, a set of TPMS and temperature valve stem caps for eight wheels costs $380 to $600, including the display monitor. A set of 8 with internal mounts for wheels adds about $100. A color monitor might also elevate the price by $25 or so, but it’s useful for systems that measure both pressure and temperature.
Photo Credits: technorv.com

More Americans went camping last year, even with many traditional campers giving up on the lifestyle, probably due to advancing age. Campers are getting younger—maybe younger than ever—and coming from more diverse ethnic backgrounds.
The question: Will newer, younger campers embrace RVing as their parents and grandparents did? So far that appears to be happening.
Figures reported by Cairn Consulting Group in the 2018 North American Camping Report, the fourth such survey conducted for Kampgrounds of America, show that between 2014 and 2017, the number of U.S. households that camp a least once a year increased by more than 20 percent. Many campers, especially new and first-time ethnic minority campers, said they intended to camp more often last year, the report shows.
As of 2017, the number of U.S. households that camped at least once a year numbered 38,558,000, up nearly 3.9 percent from the year before. Between 2014 and 2017, the researchers found, the number of households that camped three or more times per year increased 64 percent, from 11 million to 18 million.
Bouncing Back from the Great Recession
The Great Recession in 2009 and 2010 had lingering effects on American camping, as it did on many segments of the economy that involved discretionary spending. Researchers at Statista.com found that the number of American campers increased about 3.1 percent between 2012 and 2017, but that the total number of campers was lower in 2017 than for each year between 2008 and 2011.
Increasingly, Americans who do camp are using their own RVs. The Recreational Vehicle Industry Association reports that manufacturers shipped about 483,700 RVs in 2018. That was a 4.1 percent decrease from 2017, but remember this: 2017 RV shipments were an all-time high, at about 504,600 units. The 2018 figures were still 12.3 percent higher than in 2016.
In 2016, the RVIA said, more than 9 million American households had an RV, the most ever. With sales increasing since then, and more first-time campers, that figure is likely higher in 2019. It’s dramatically improved over recession-level RV shipments, which totaled a mere 165,700 in 2009.
New Faces of Camping
The camping experience on all levels is spreading through the American population as never before, the 2018 North American Camping Report shows:
More young campers: Gen Xers, who make up 27 percent of the population, according to the Census, comprise 36 percent of campers. Millennials, a generation that has shown interest in the environment and physical activity, echo Gen Xers’ involvement. Although Millennials comprise 31 percent of the general population, they make up a larger share of campers—40 percent, the largest group by age. Baby Boomers, who made up 28 percent of campers in 2015, are down to 19 percent. Mature campers—that is, seniors—are down to 5 percent, less than half their share of the general population.
More minorities: More people from ethnic minorities are getting into camping. African Americans, once less enthusiastic about camping, are now participating in numbers more nearly proportionate to their makeup in the general population. Among new U.S. campers in 2017, Statista reports, 14 percent were African American, 17 percent were Latino and 17 percent were Asian/Pacific Islanders. Among all U.S. campers in 2017, whites made up 72 percent; African Americans, 8 percent; Latinos, 10 percent; and Asians/Pacific Islanders, 7 percent.
More children: More children are camping because two parent-age groups, Millennials and Gen Xers, together make up three-quarters of all U.S. campers, and many have children, Cairn researchers found. Just over half of all camping families have children who participate.
More RVs: Buyers 35 to 54 years old are the largest segment of RV owners, according to the 2011 University of Michigan study of RV consumers commissioned by the RV Industry Association. Leading-edge Millennials are fast approaching that age group. Historically, senior campers have been the strongest segment for RV ownership, an age group that baby Boomers are beginning to reach. That makes it likely RV sales will continue to rise.